Platform QA Tickets Instruction
Brand Navigator URL: deep.blueocean.ai
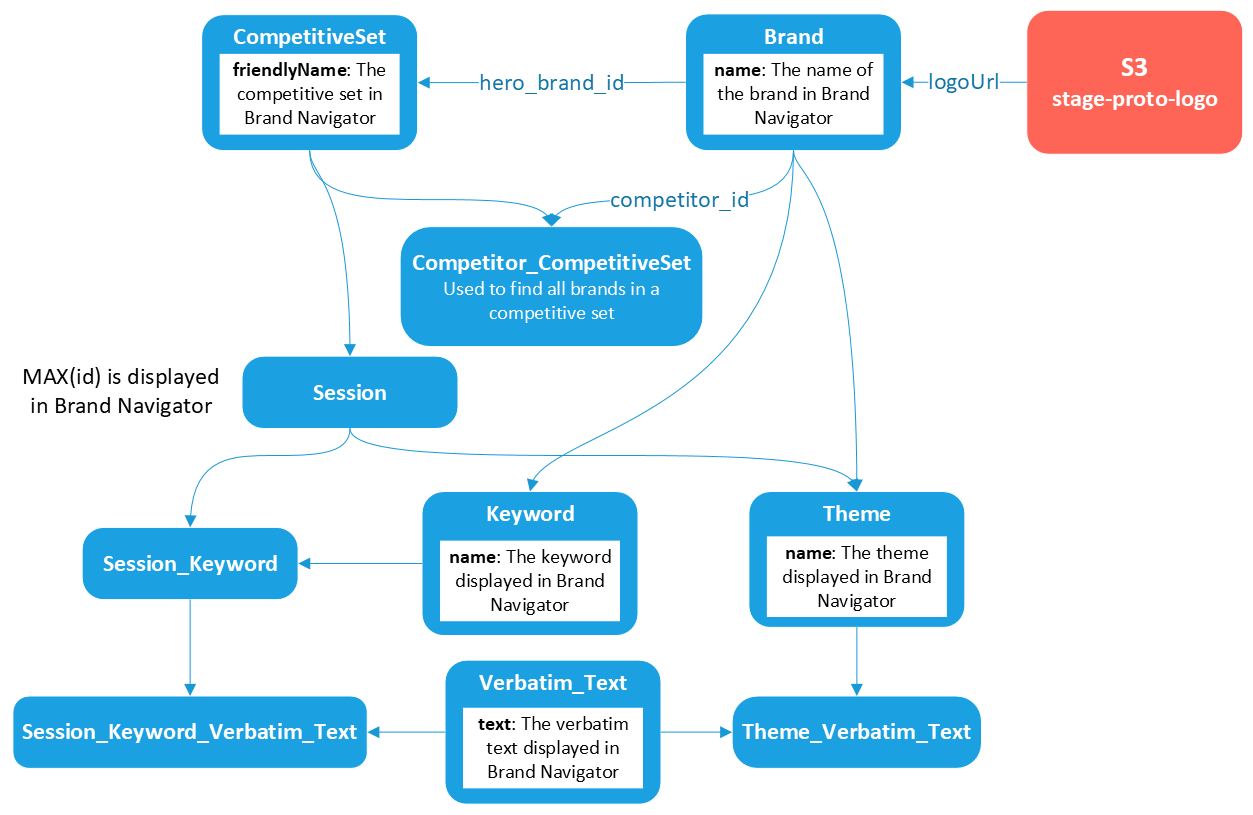
Database Schema
Introduction
In this project, BlueOcean will assign different tasks through a platform called “ClickUp”, they call the tasks on this platform as “Tickets”. One ticket refers to one task. There are different types of tasks that the client want you to help with, in other words, there could be different tickets assigned to you on the “ClickUp”. In this introduction, it will guide you to learn the following things:
How to interact with ClickUp in order to manage your tickets assigned to you.
Introduction of different types of tickets
Helpful Resources that you may need when you are solving tickets.
ClickUp Instruction
After you get an active account from the client, you can download ClickUp from the public internet. ClickUp doesn’t require any VPN, so you can feel free to log in ClickUp.
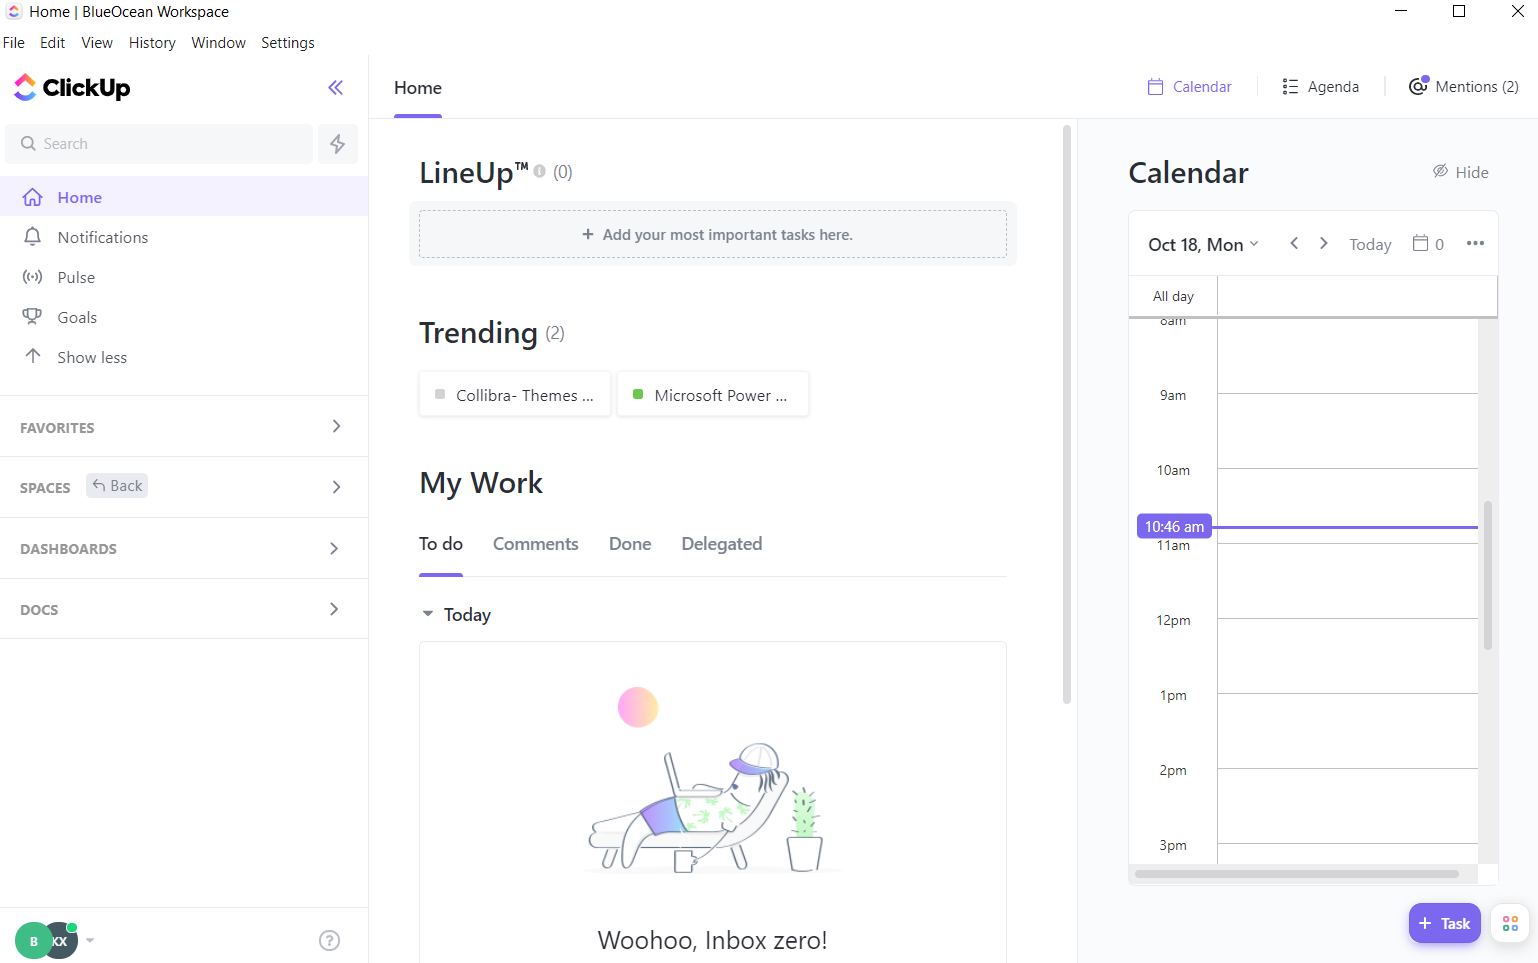
Below is a screenshot that you may see when you open it for the first time.
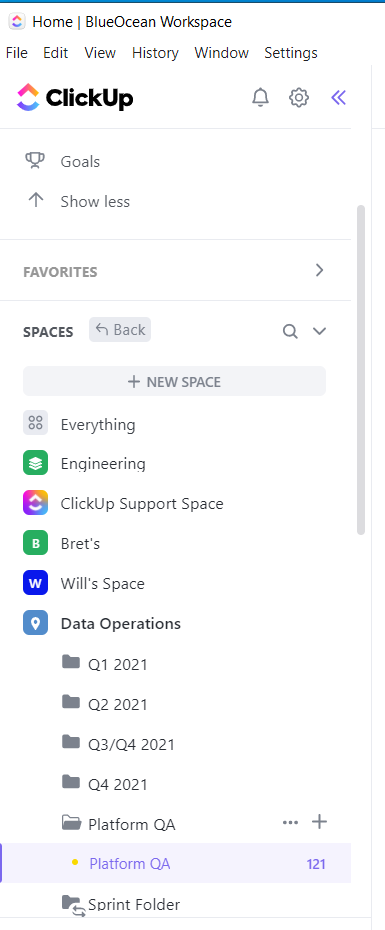
Go to the “Space” feature on your left side of your ClickUp, and down to the “Platform QA” section shown in the pic. You will find the ticket board there.
If you go to the right place, you will see something like the pic below. There is a to do list in the board and you can pick a ticket assigned to you.
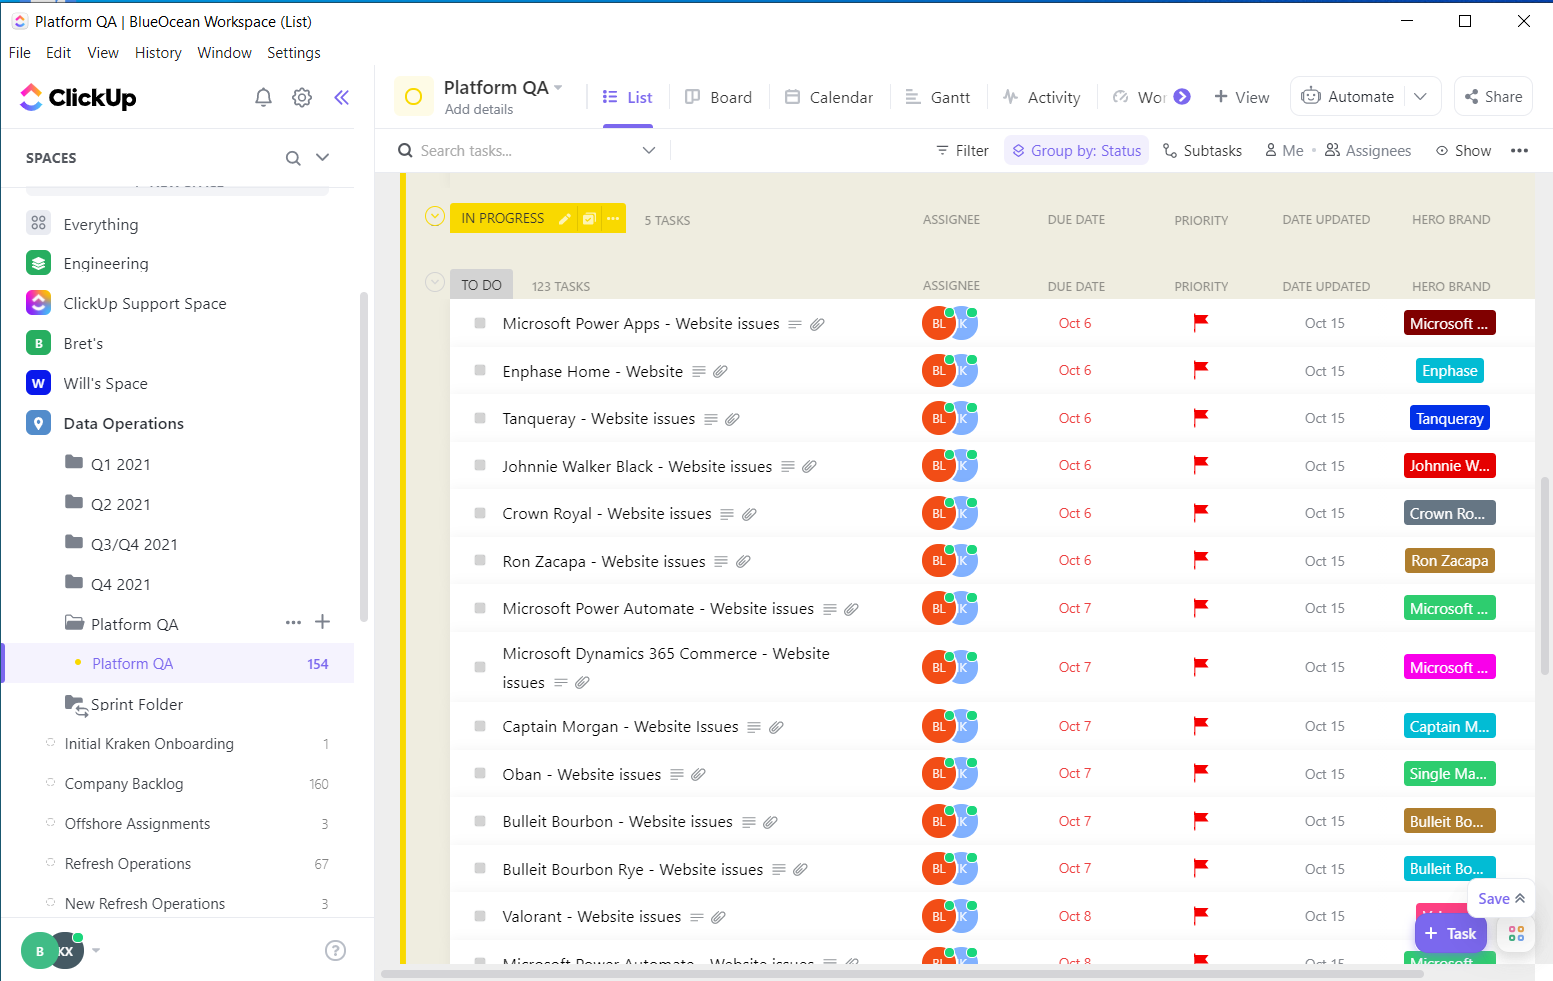
Please note that, you can use “filter” feature on the top bar to help you identify the tasks assigned to you quickly through ClickUp, but please not to save the view when you are doing a filter as changes you made on the ClickUp will be presented to everyone.
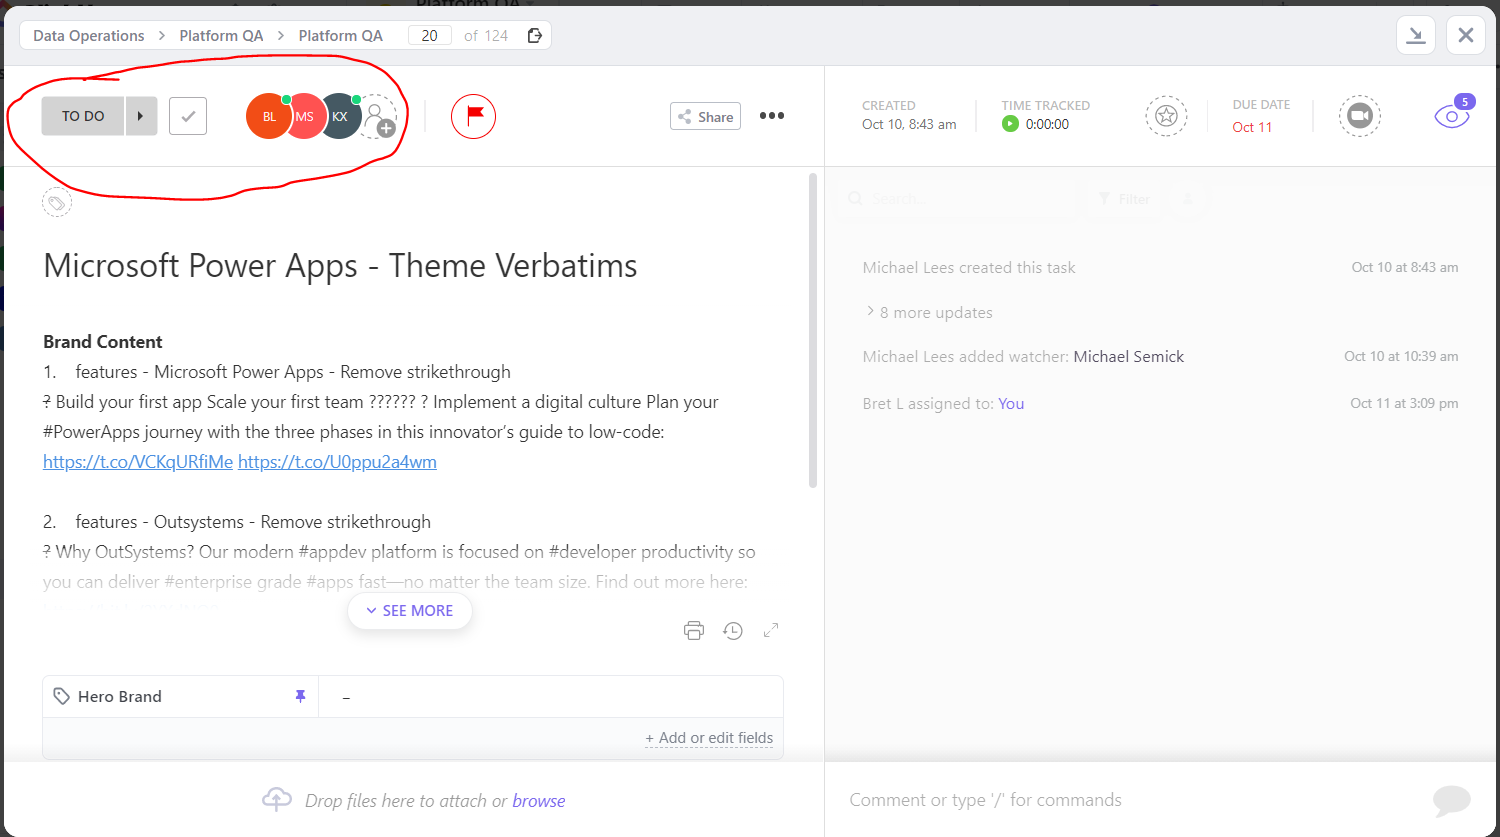
Select a ticket assigned to you then you will see something like the pic below. Here are some changes you need to make if you are going to take this ticket. In the status bar(in the red circle), change the “TO DO” into “In progress”, remove other people except for you in the assignee bar(in the red circle)
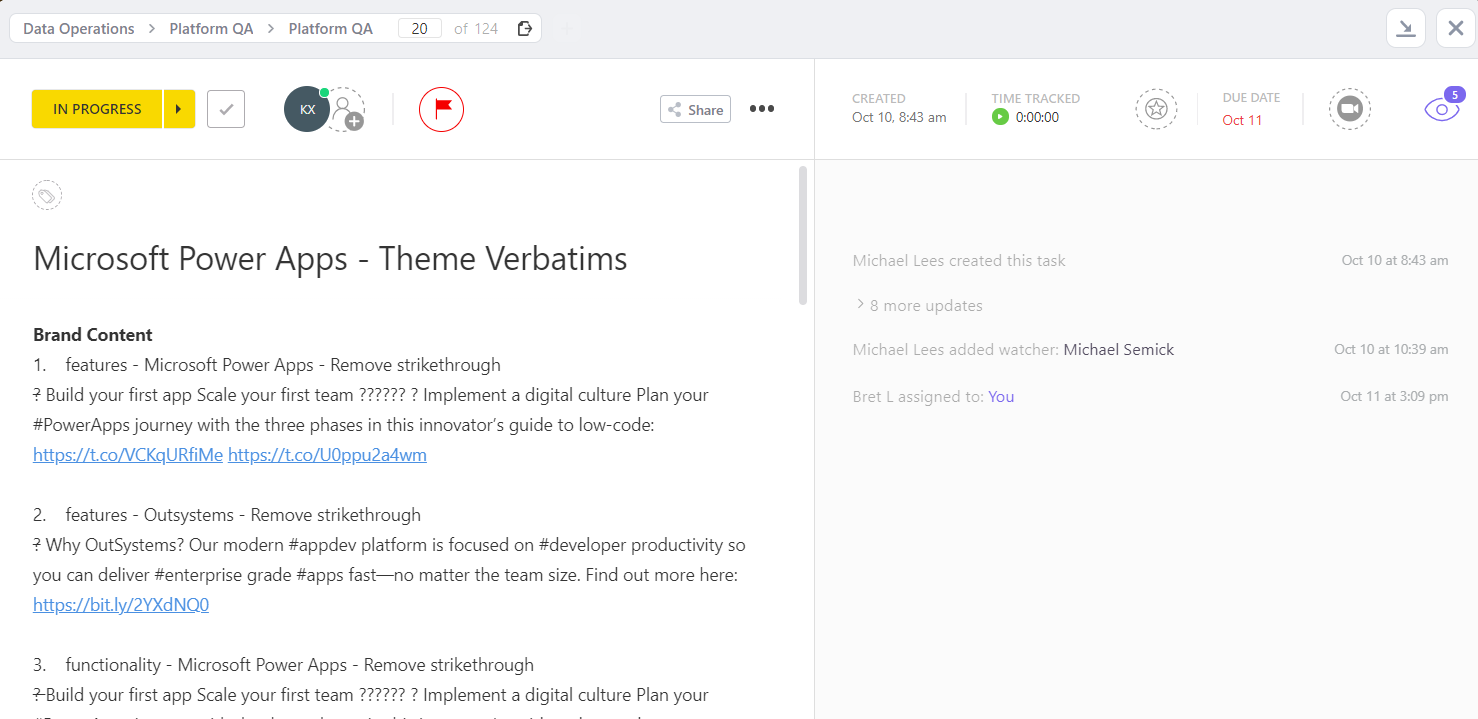
When you successfully complete step4, you will see something like the pic below.
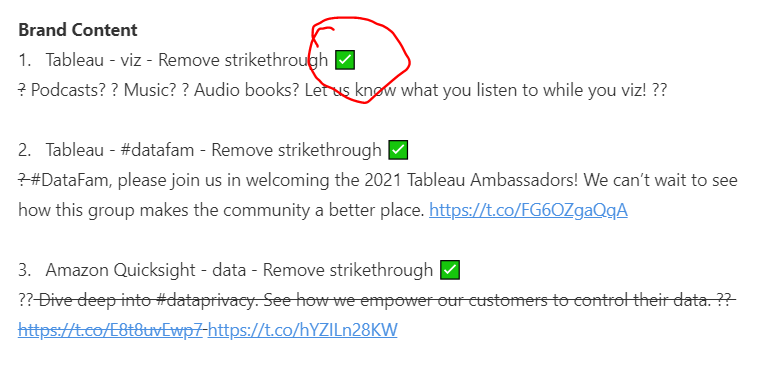
When you successfully complete a tasks within a ticket, use a check marker to tag it, you can refer to the pic below for how to do this.
7. When you complete all the tasks within a ticket, comment “Done, please confirm”(or anything else like that) in the chat box, then assign the ticket to “Will Cullum”(Sometimes, Bret would like you to assign the ticket to him), finally change the status bar into “QA”. If you complete the step 7 correctly, you will see something like the pic below.

All done! You can move to the next ticket. If the client has question regarding your completed works, they will get back to you and ping you in either ClickUp or Slack. If you have any concerns, you can also ping Bret in the chat box and wait for his response.
How to solve different tickets
If you open the ClickUp and use its search bar to search for the documentation called “Platform QA - Engineering perspective”, you will see a list of all types of tickets and corresponding solutions.
Here is the internal link that will redirect you to that doc: Doc on ClickUp.
You may find some rough ideas from that documentation. If you failed to find that doc, please refer to the screenshots of that doc, the instruction put them at the bottom of the instruction.
Now, the instruction is going to walk you through the specific steps that you need to complete for different tickets.
Website Ticket
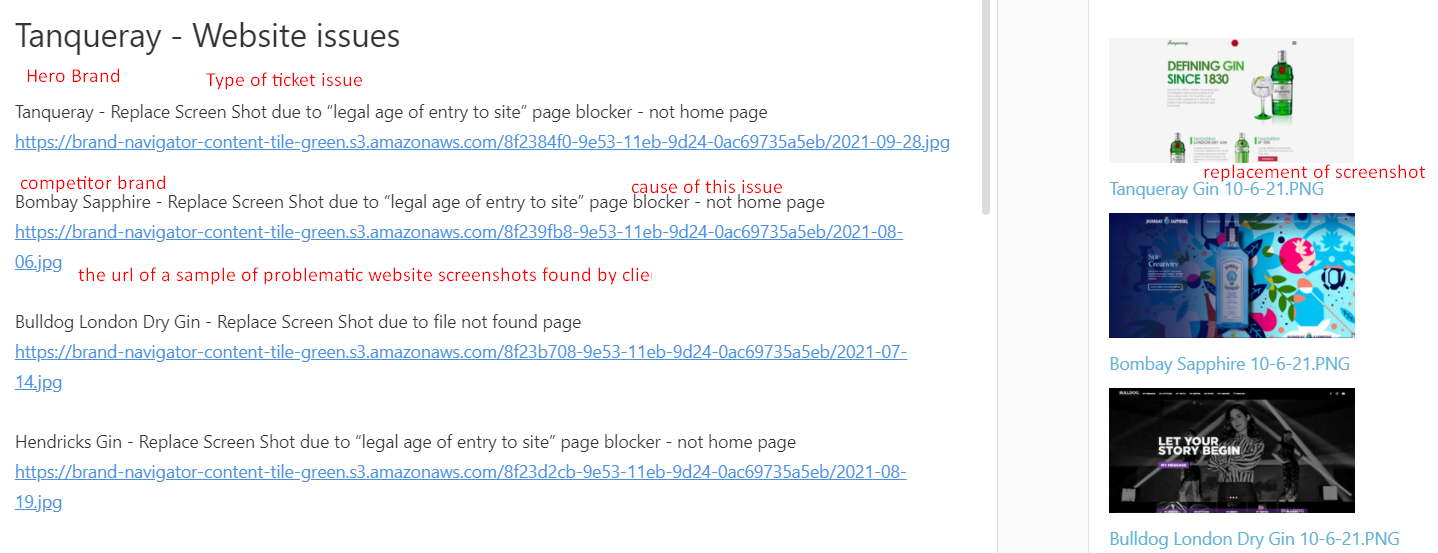
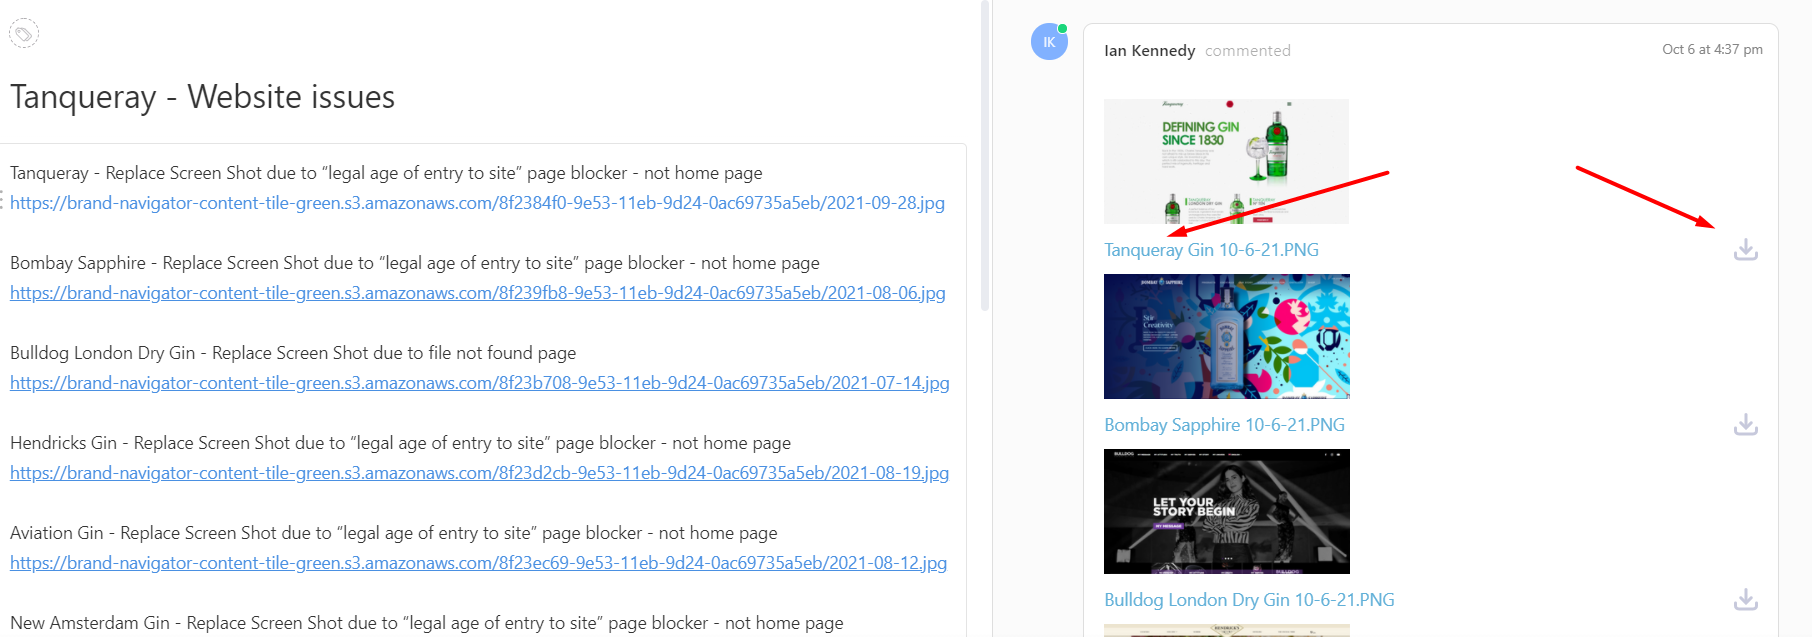
1. Here is an example of a website ticket. Hero Brand is the main brand that you need to deal with; Competitor brand is the specific brand you need to deal with for each task; Cause of issue is the reason why the client feels like there is an issue; The url indicated what is the url of the problematic website screenshot.
2. Refer to the ticket description, now you can go to client’s platform and find corresponding issue. For website ticket, firstly you choose the right hero brand. You may find a button which allows you to pick right hero brand on the top bar.
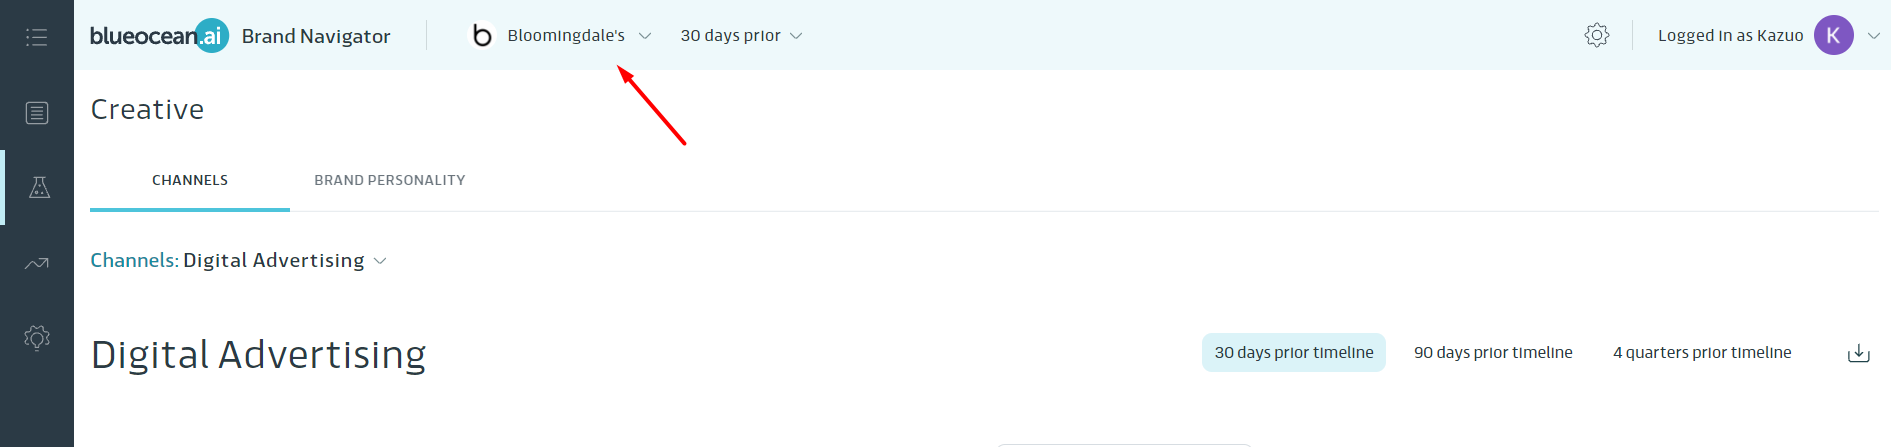
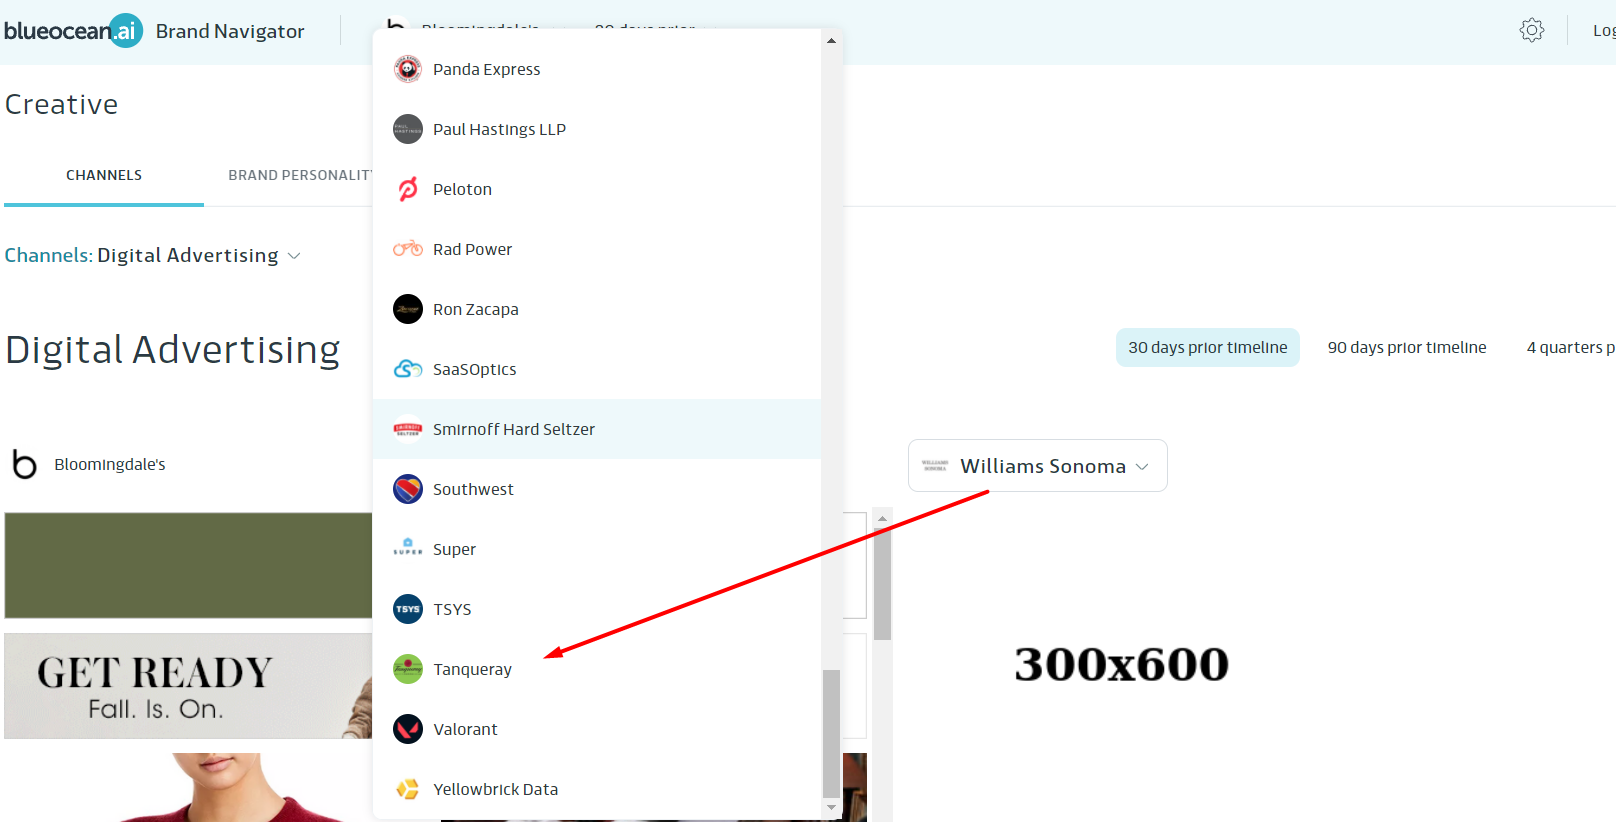
After you find the button mentioned in the step 2, you can find a list of hero brands, choose the one mentioned in your ticket.
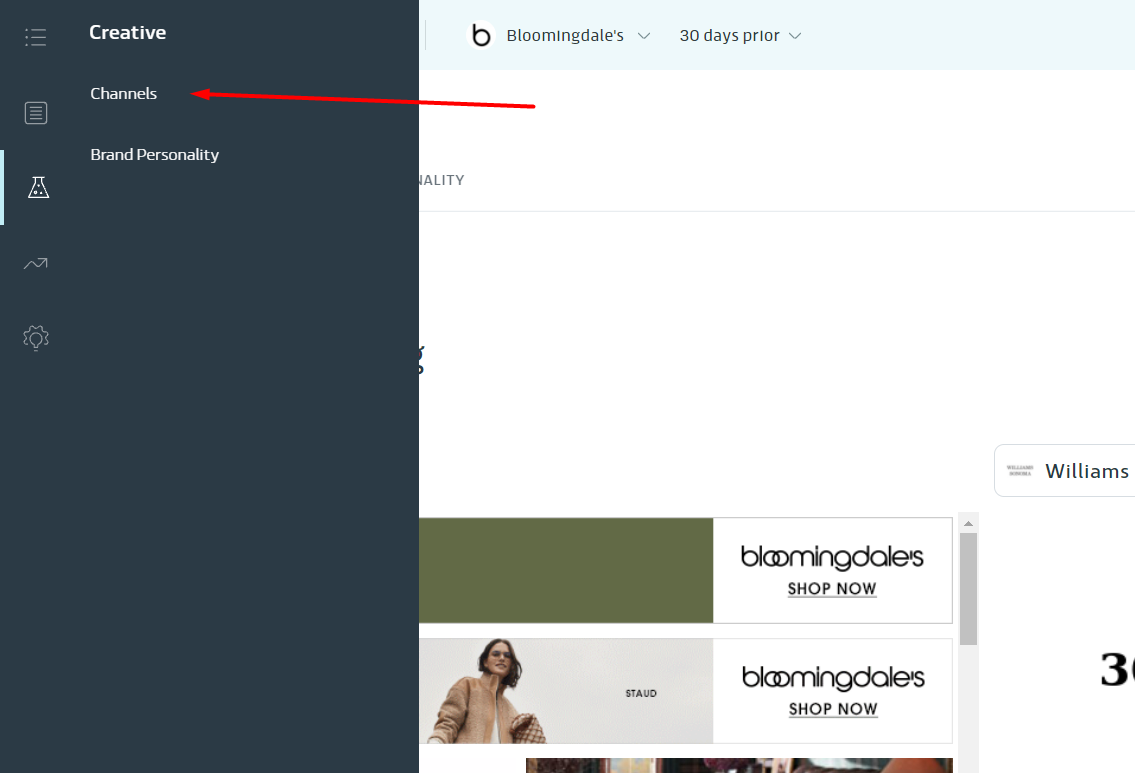
Now, let’s go to the the place where issues happened. Please follow the arrow in the pic below and go to Creative-Channels, then you will be navigated to a new page.
In the new page, you click the “Website” button on the page.
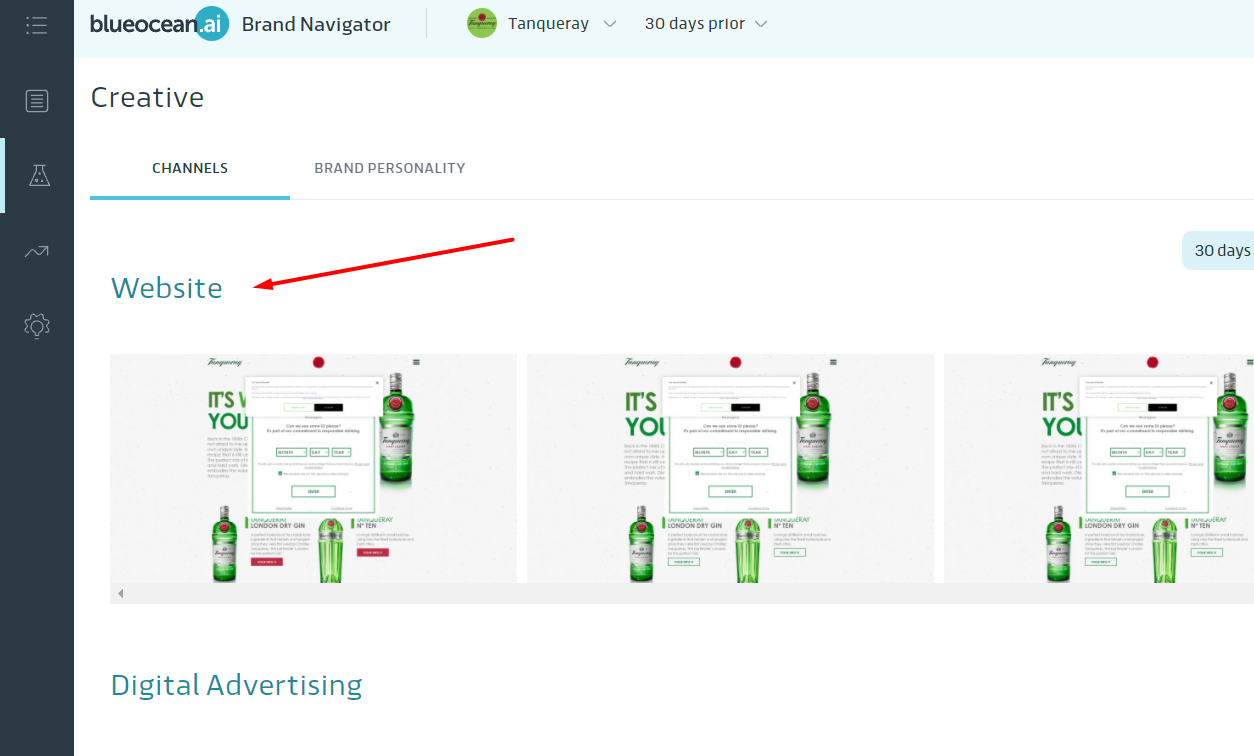
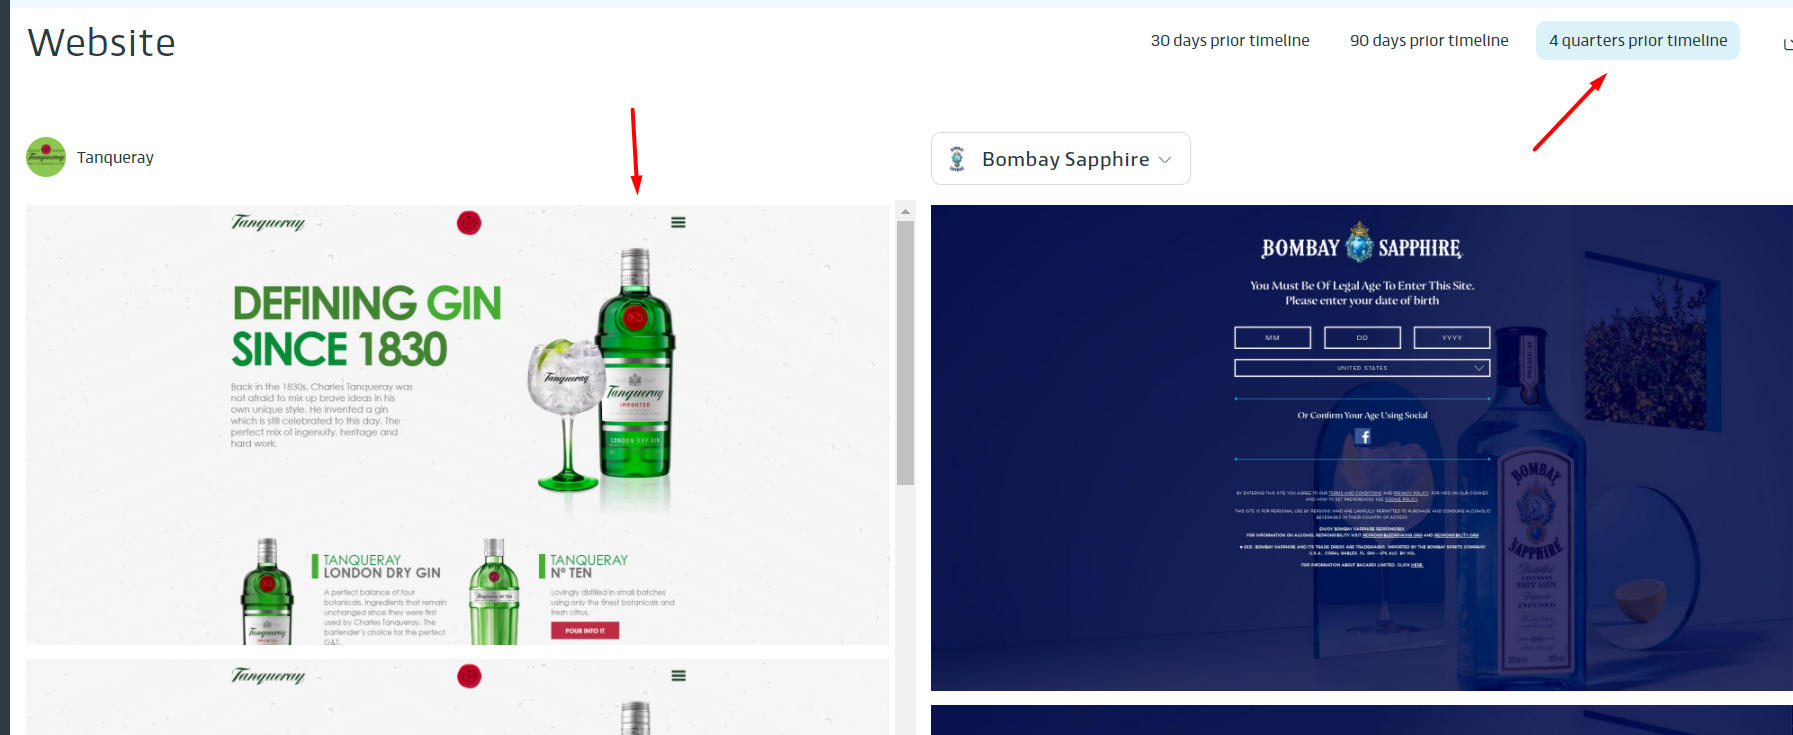
After you clicked the “Website”, you will go to another page which presents the website screenshots for both hero brand and different competitor brands.
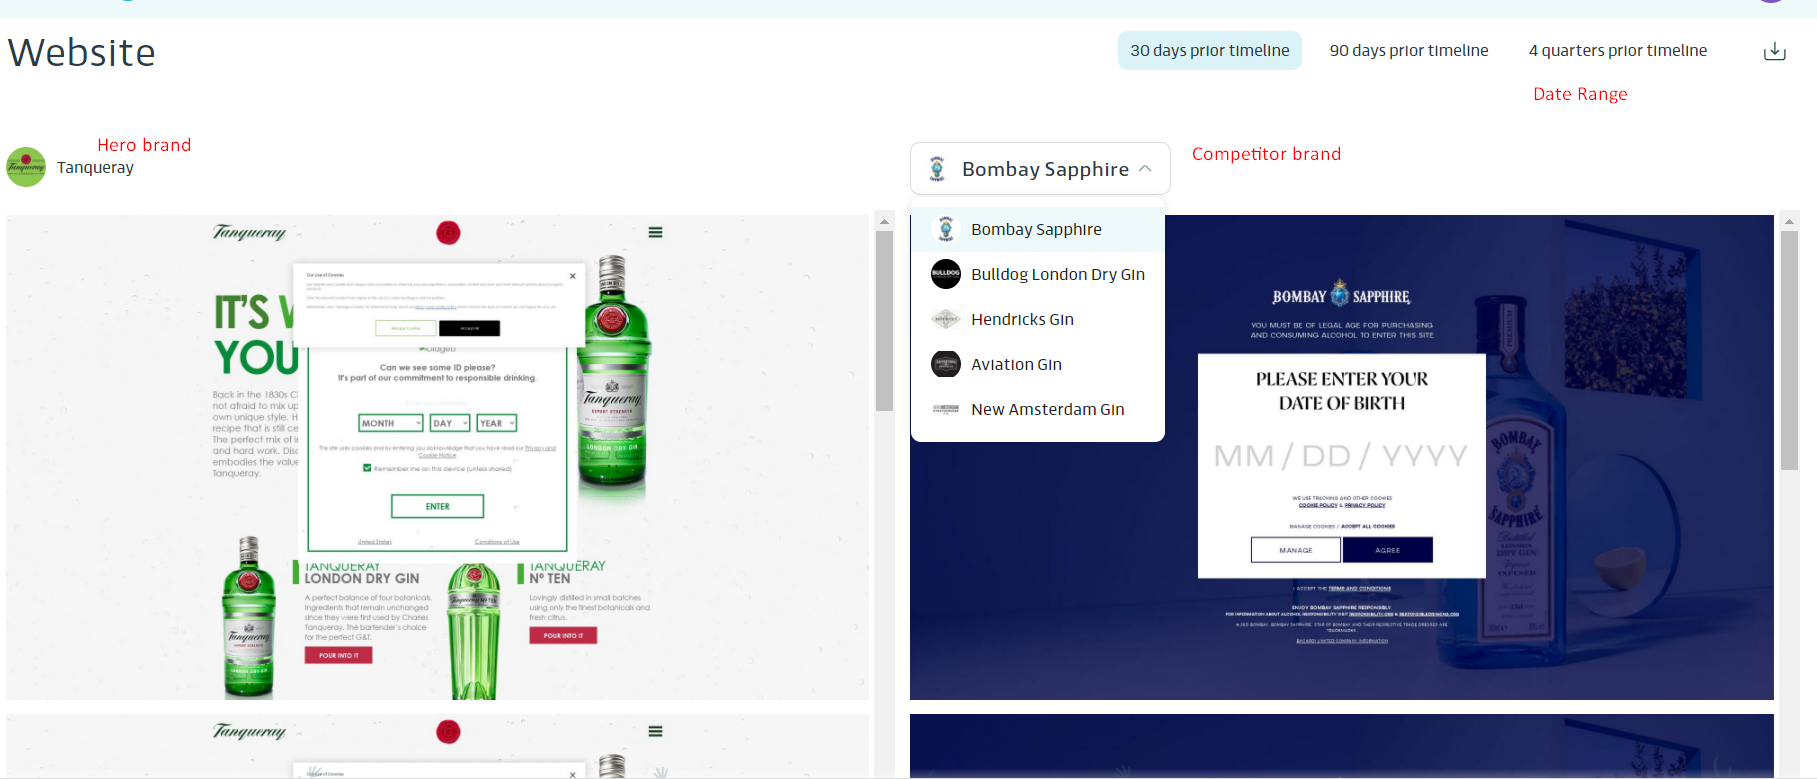
In the example ticket given in the step 1, it said the hero brand has problematic screenshots due to pop-up. Now you can see the problematic screenshots in your current page.
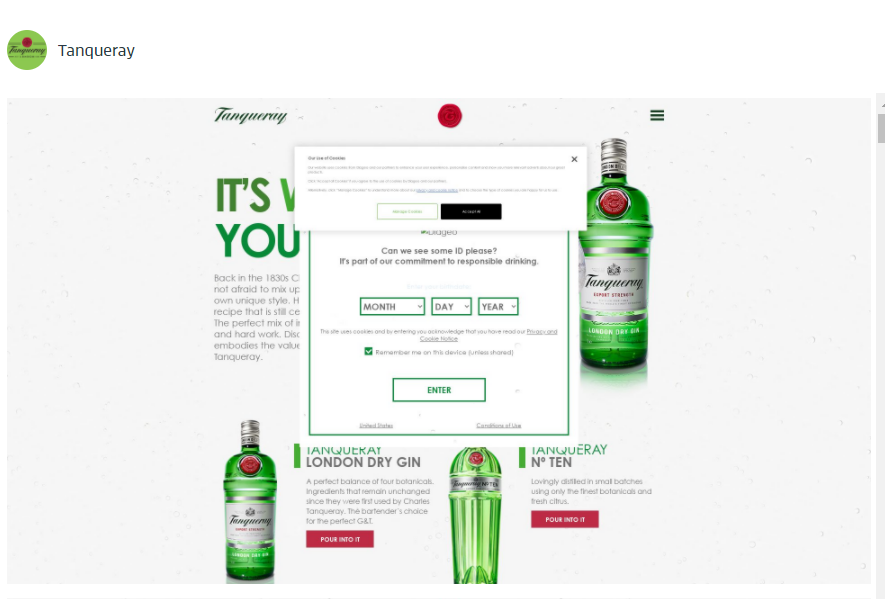
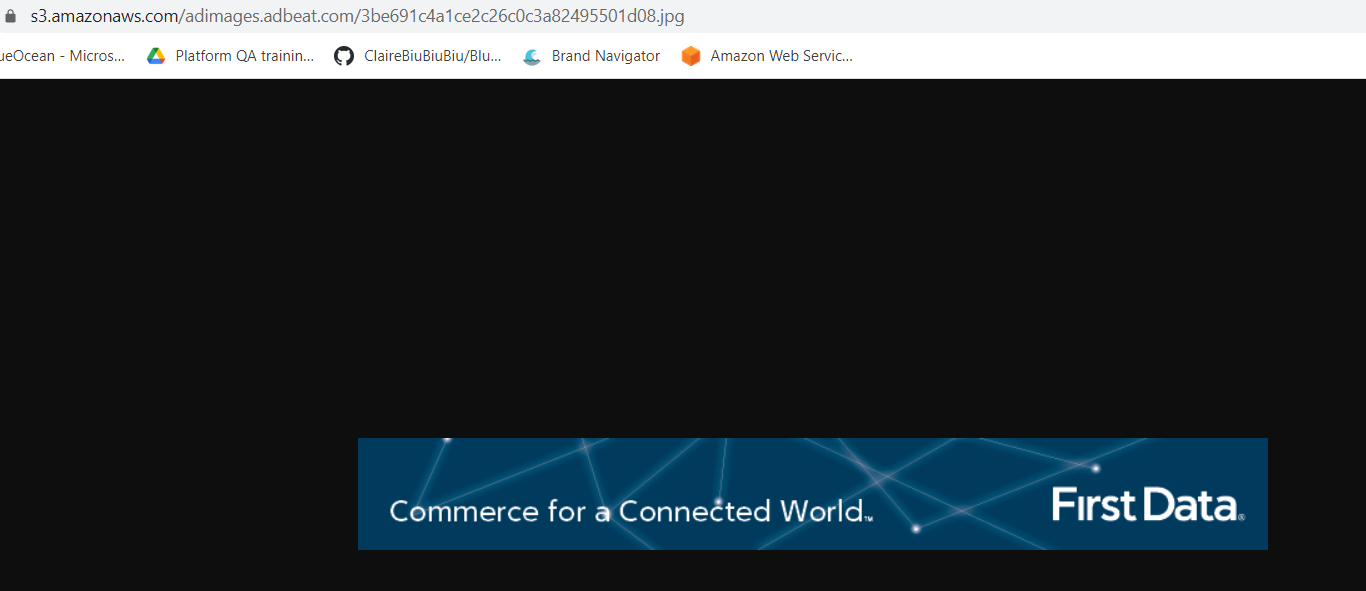
8. Your target is to use correct screenshot to replace and remove the problematic screenshots. To find where the screenshots stored for this brand. You right click the screenshot and open it in another tab, then you can find its address. It should be a S3 object url, so you can find all those screenshots on AWS S3 according to its url info.
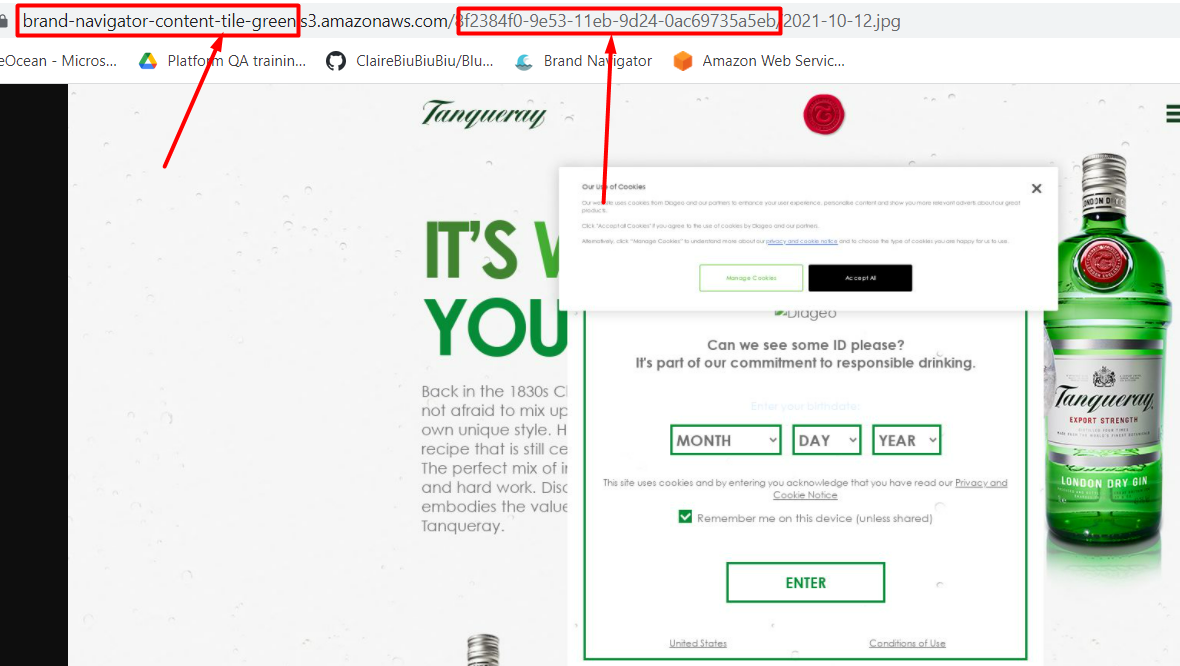
Use the information addressed in the pic of last step, you can find target S3 object step by step.
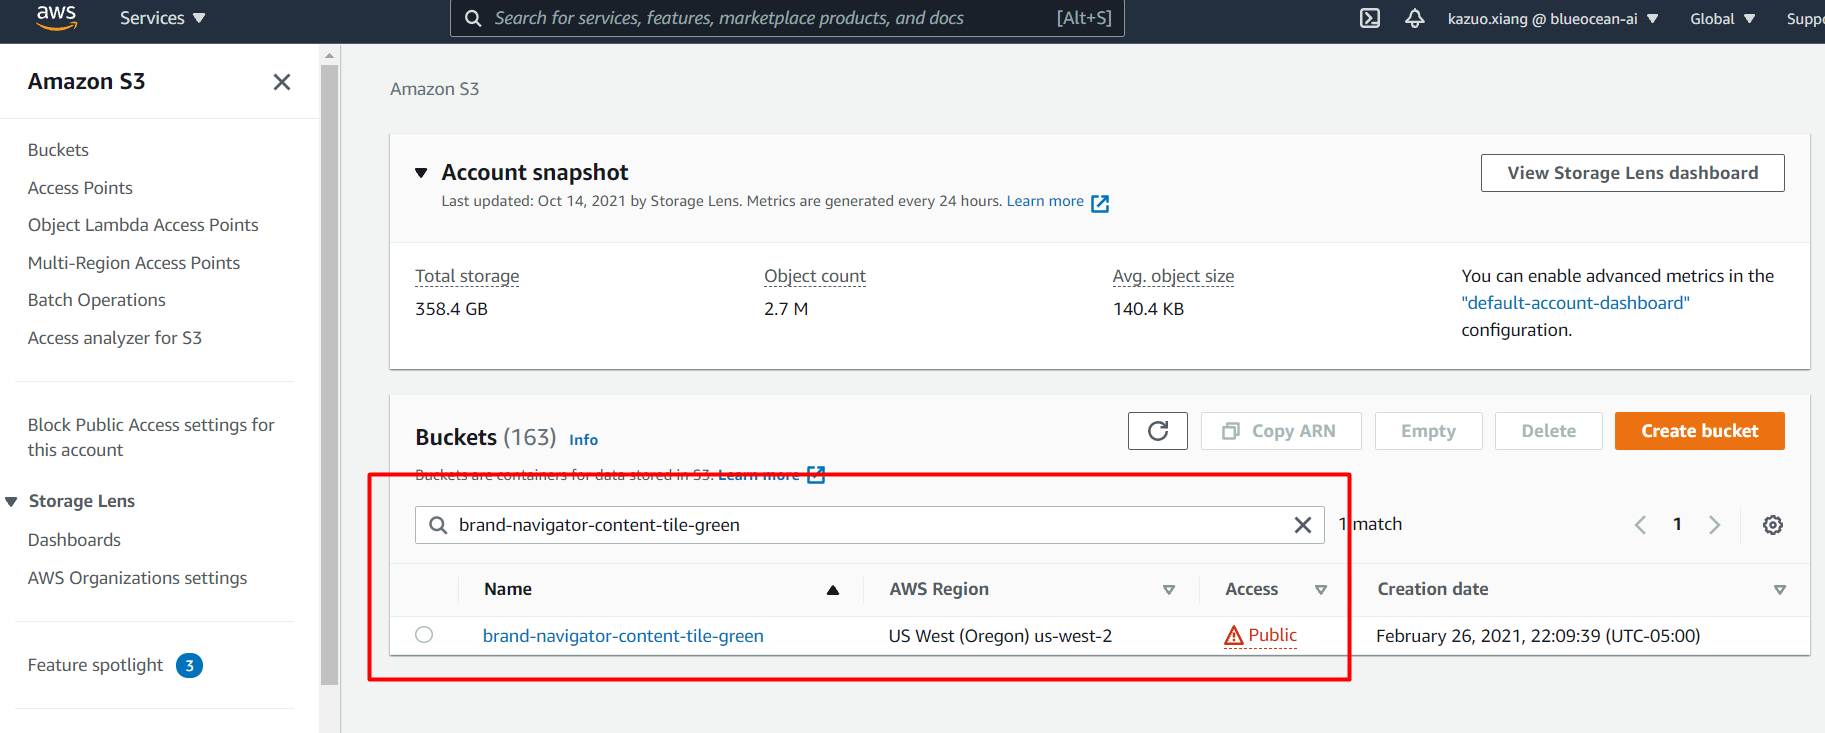
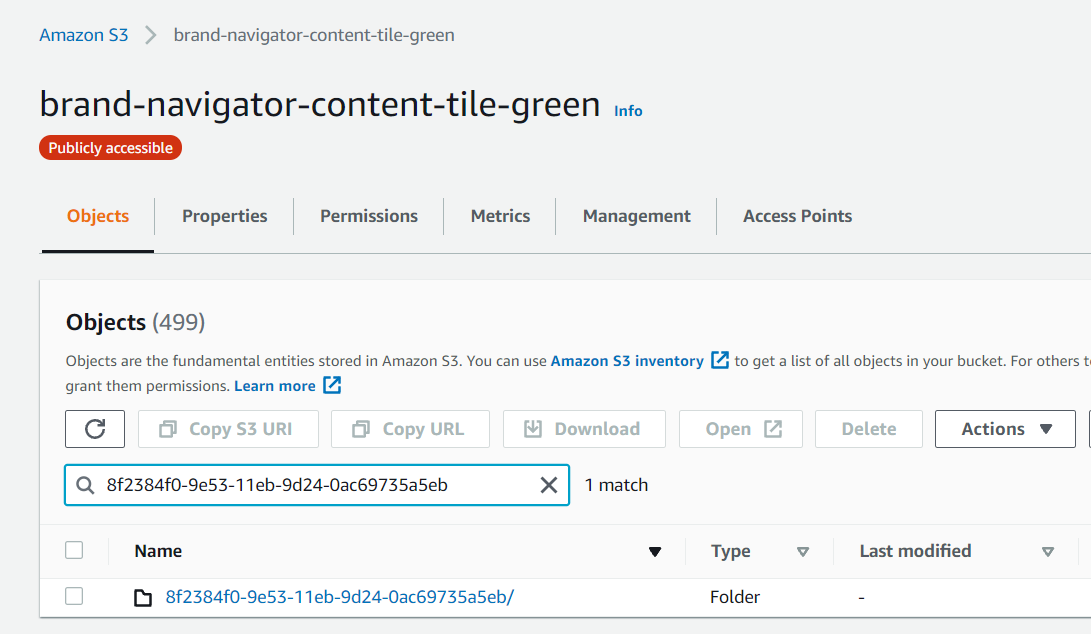
Now we find the place where stores the screenshots for the brand you need to deal with. Next, you find the latest S3 object and remember its object name or say latest date.

Go back to ClickUp and download the correct screenshot. We are going to use it instead of the incorrect one.
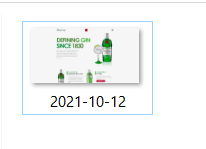
After you download the correct screenshot, rename it with the latest date you found in the step 10
Upload renamed screenshot to the bucket you found in the step 9 and 10.
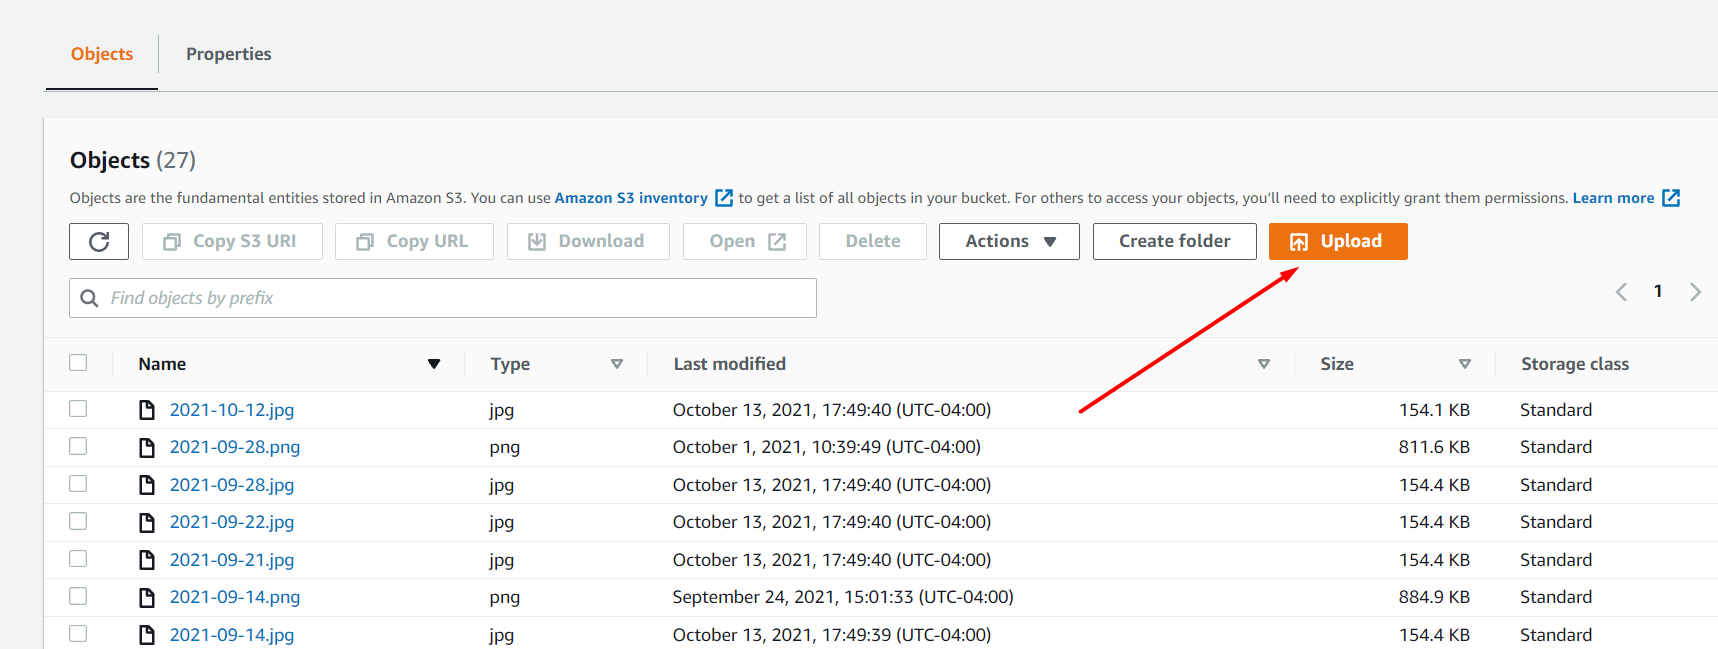
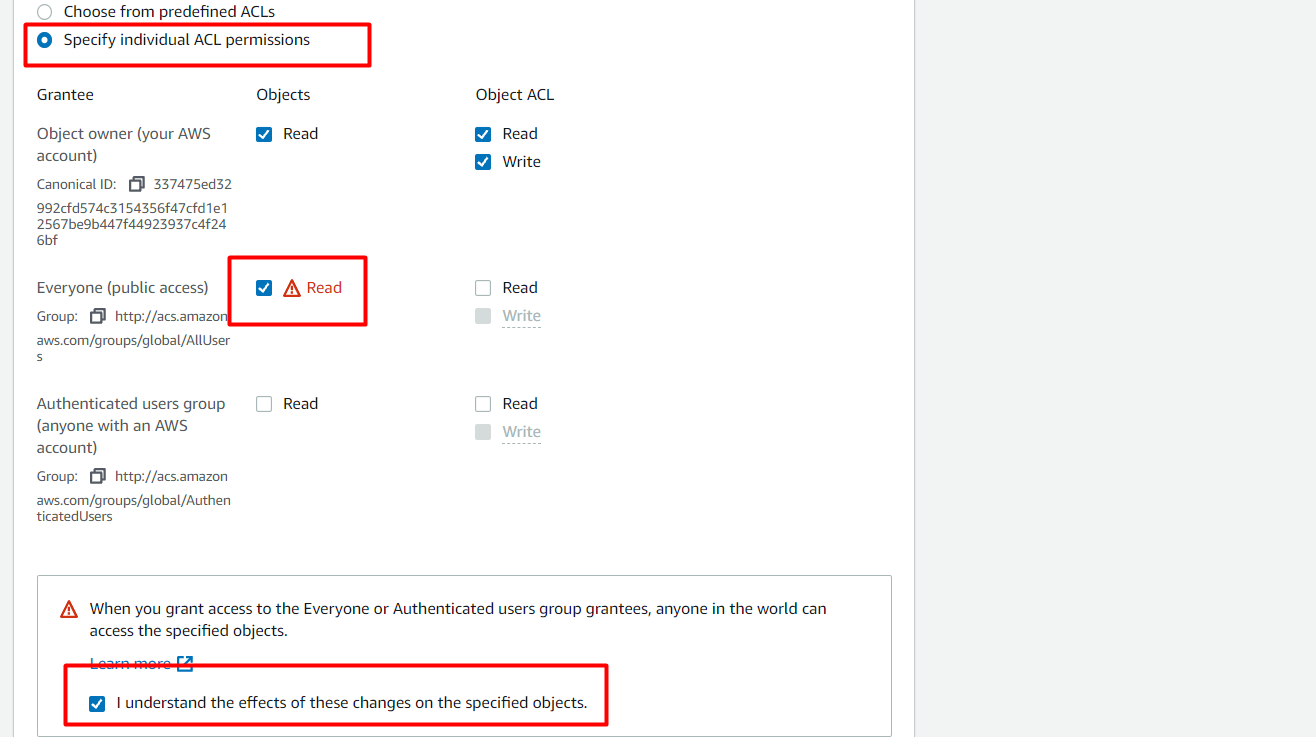
When you are trying to upload the S3 object, make sure it is public to everyone.
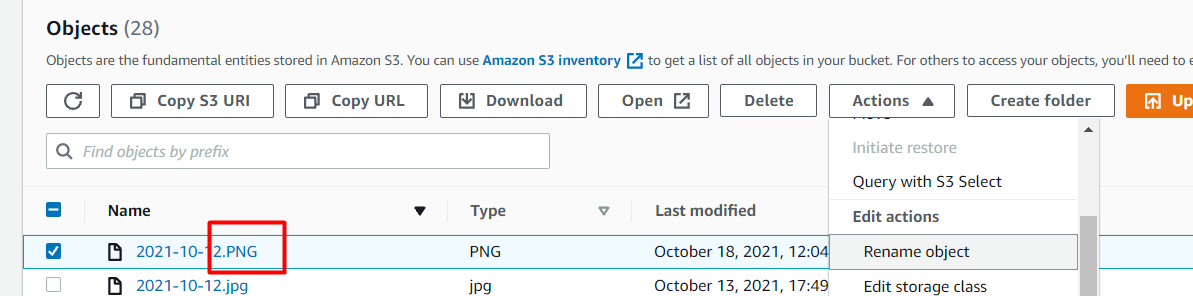
After you complete uploading, you rename the object just uploaded. Replace the “.PNG” with “.png”.
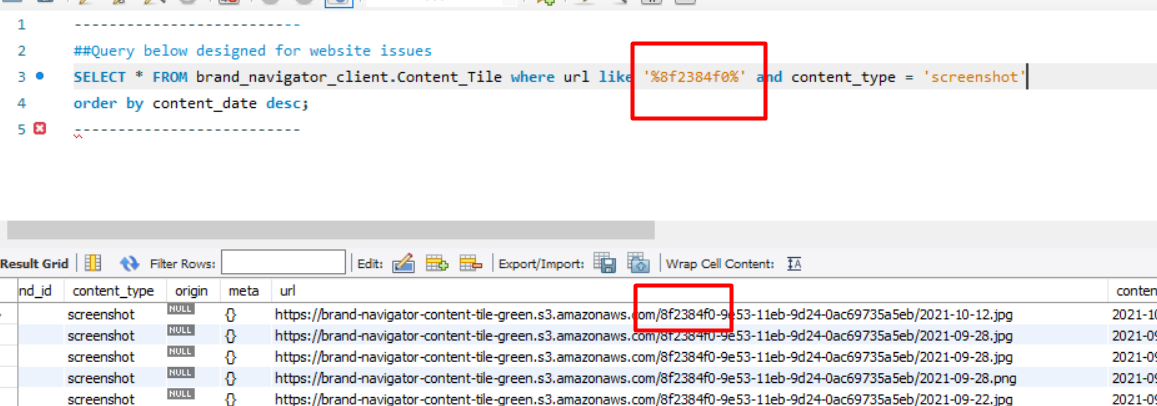
16. Now, we got our screenshots uploaded, but we need to modify the mapping between database and S3 as well. The website is depending on the database. Keep the information you find in the step 8, go to the database and use correct query(all the queries have been commented, you can easily find which query you need to use). Use the correct query and change the where condition according to the info you got from step 8. Then you can find all the records for the brand you need to process.
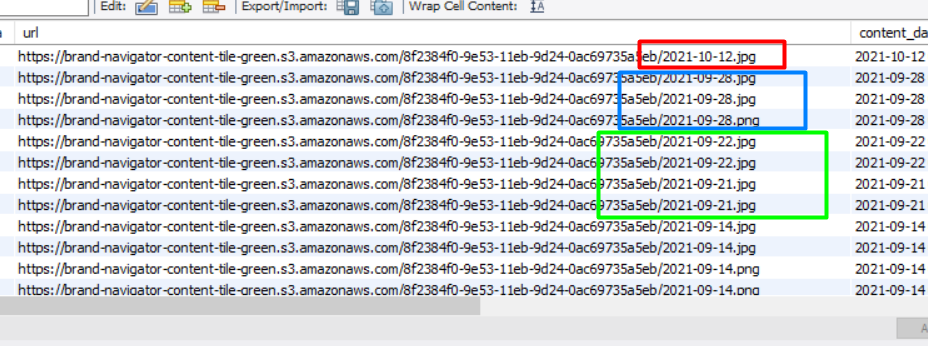
After you find the correct records, you need to follow a few rules to modify it.
(In the red rectangle), you will find latest record there. Change “jpg” into “png”
(In the blue rectangle), there will be both png and jpg in same date, in this case, change all other jpg into png.
(In the green rectangle), there will be a few days that only contains jpg. Delete these records.
Tips: Png is usually the correct screenshots; Rule c is not restrict, you may find some edge cases that jpg is correct screenshots, too. Process them with your self-judgement.
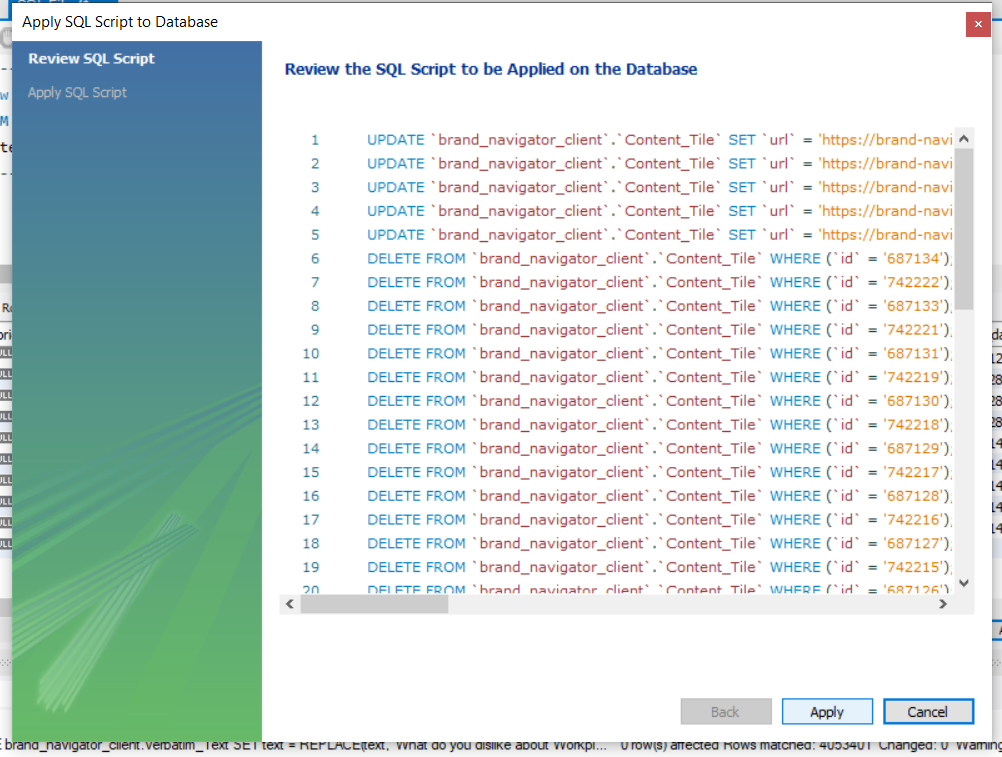
After you apply those changee manually, Use “Apply” in the MySQL Workbench.
19. Final step, let’s go back to the client’s platform and see if it works. In this example, you can see the problematic screenshots have gone already. Please, use the longest time cohort in the right corner of below pic, you will be able to valid more screenshots instead of one in a very short time range.
Keyword Ticket
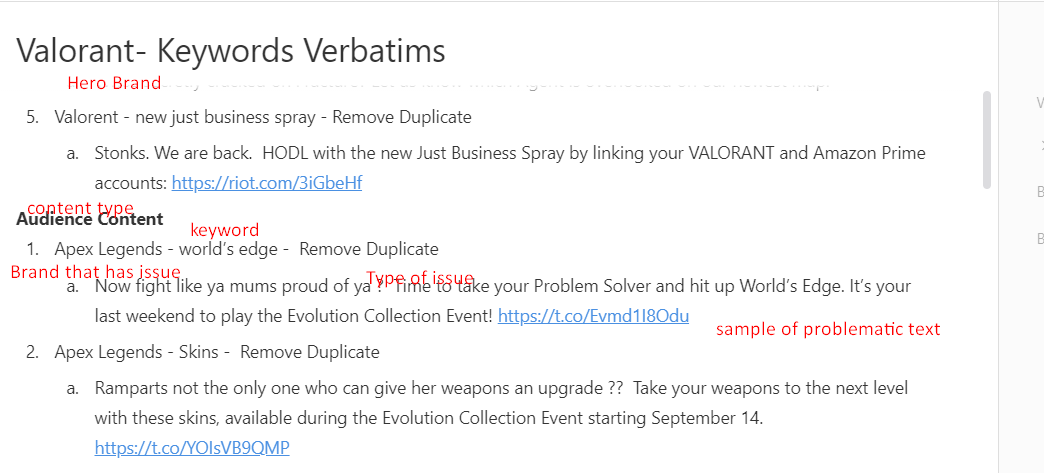
1. Here is an example of keyword ticket. You will the use the information addressed by red rectangles to resolve this type of ticket. If you don’t know the concepts of the text colored by red, refer to the instruction of Website Ticket. (The concept of keyword is very intuitive, so I didn’t cover it)
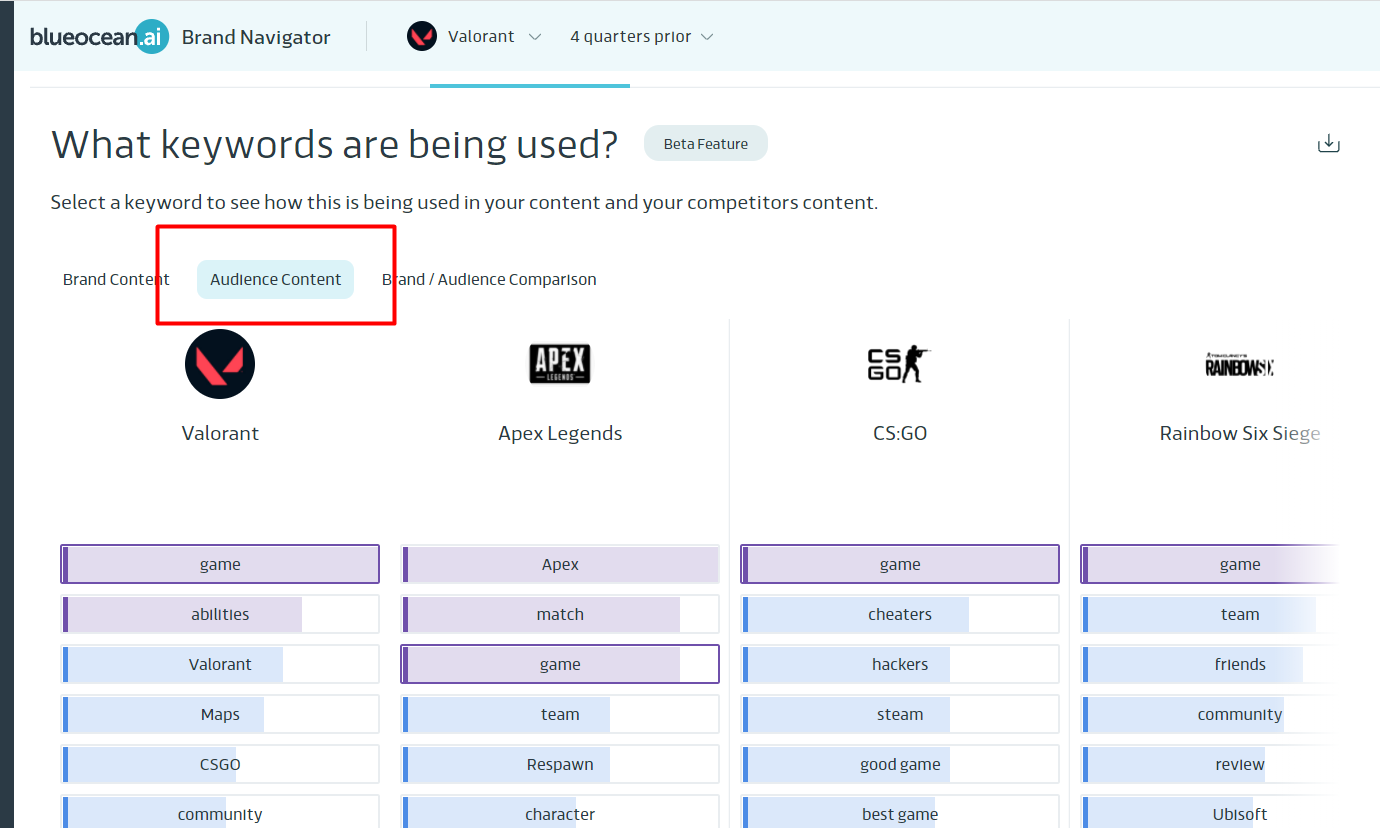
Go to client’s platform, choose correct hero brand and go to Creative–Keywords
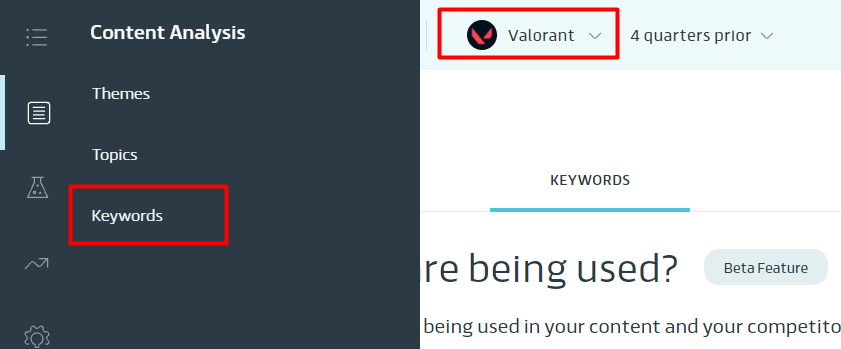
3. After you get navigated from step 2, you need to find correct content category(either brand content or audience content), refer to your ticket description on ClickUp, then you will know where you should go.
In the given example, you need to go tht audience content.
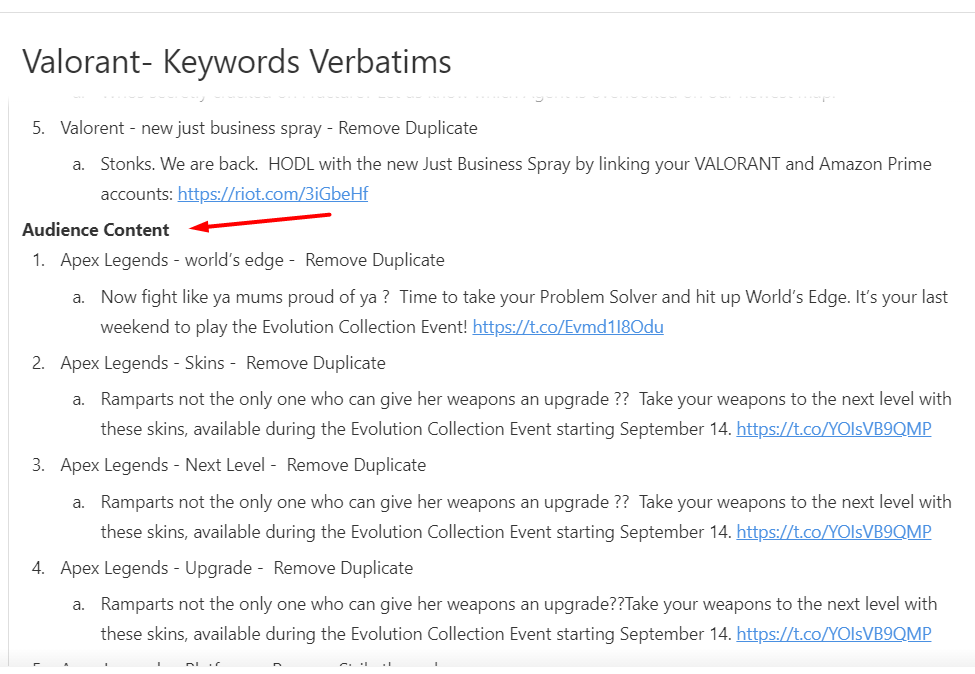
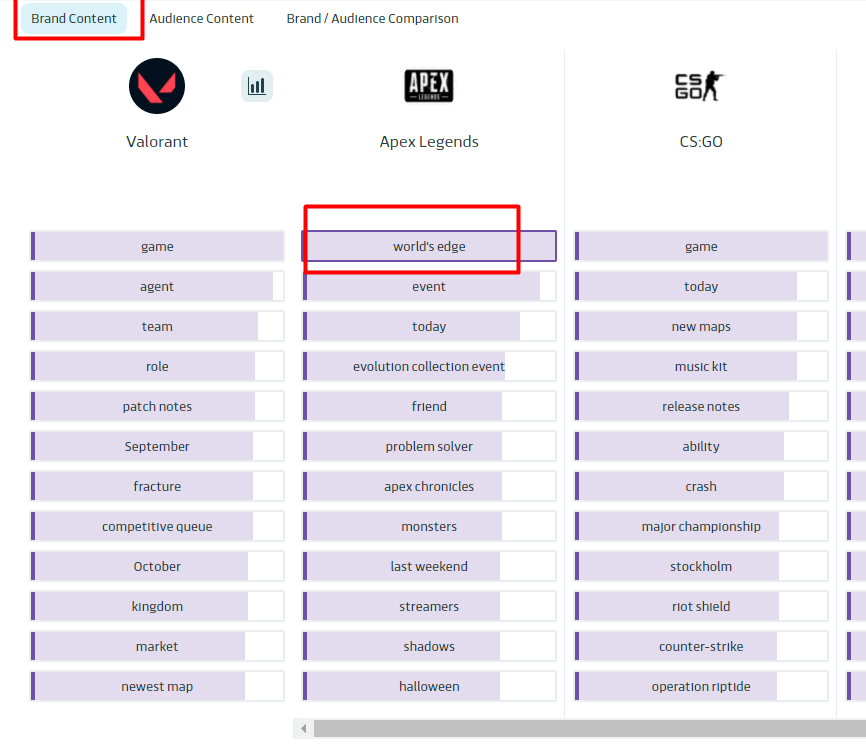
Now, let’s find the correct keyword. You can find it in the ticket description as well. See the example below.

In the given example, you need to choose “world’s edge”
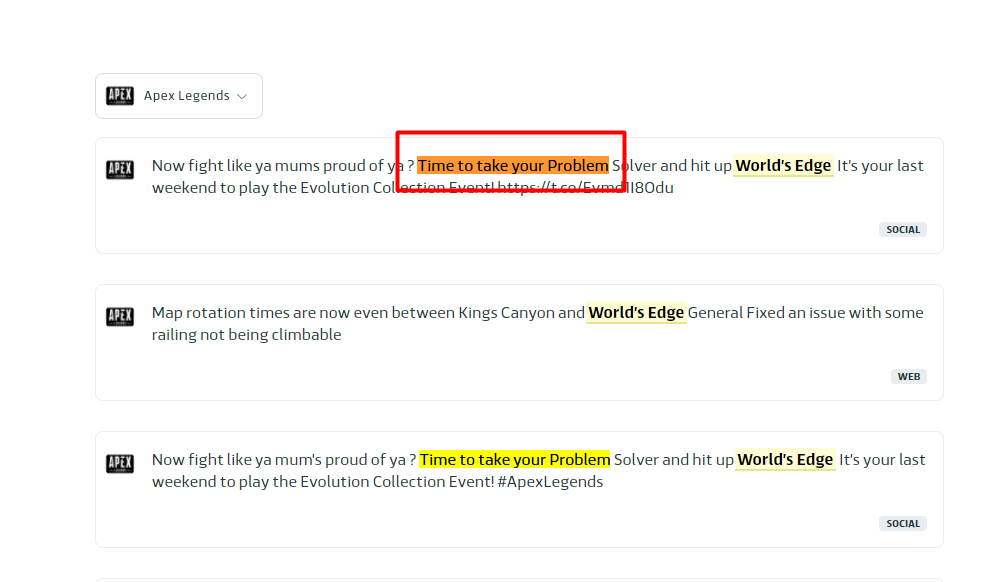
7. There are different types of tasks you need to resolve in keyword verbatim issue. In this instruction, I will only cover how to remove duplication. To find out how to resolve other types of tasks, you should refer to my queries and choose wisely, I have commented details for each query you may need to use. But sometime, you can always develop your own query to do the job. Now, in the example below, you can find duplications.
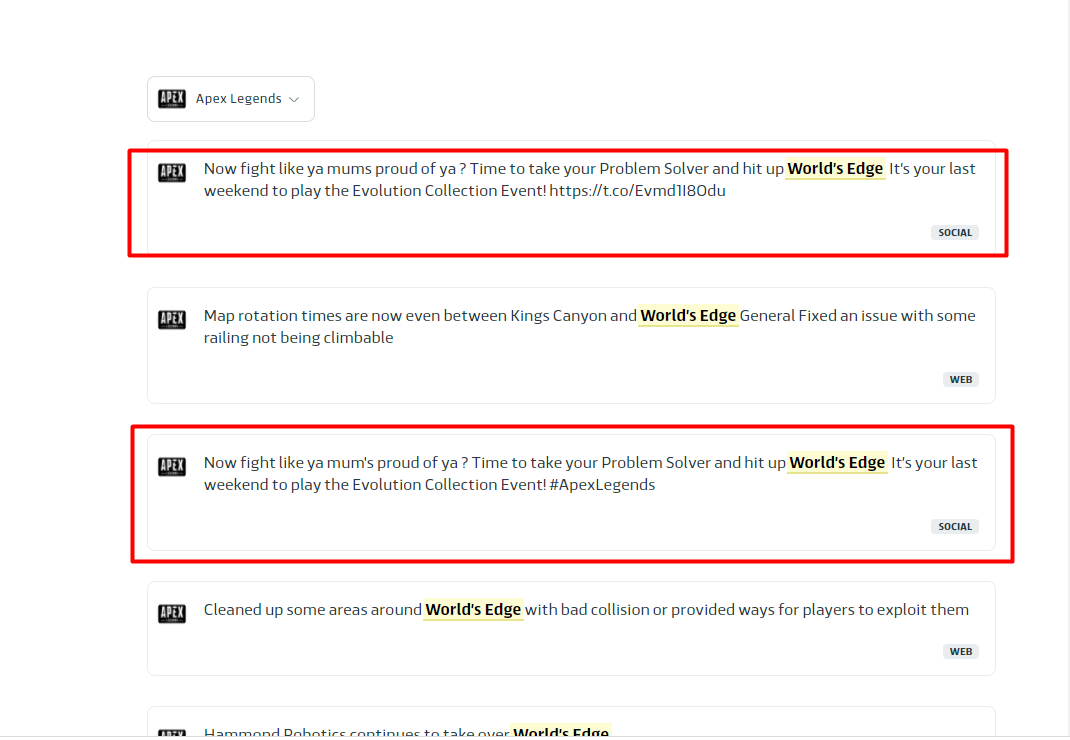
Use your self-judgement to find a substring that can uniquely identify the problematic text(This is the keypoint!).
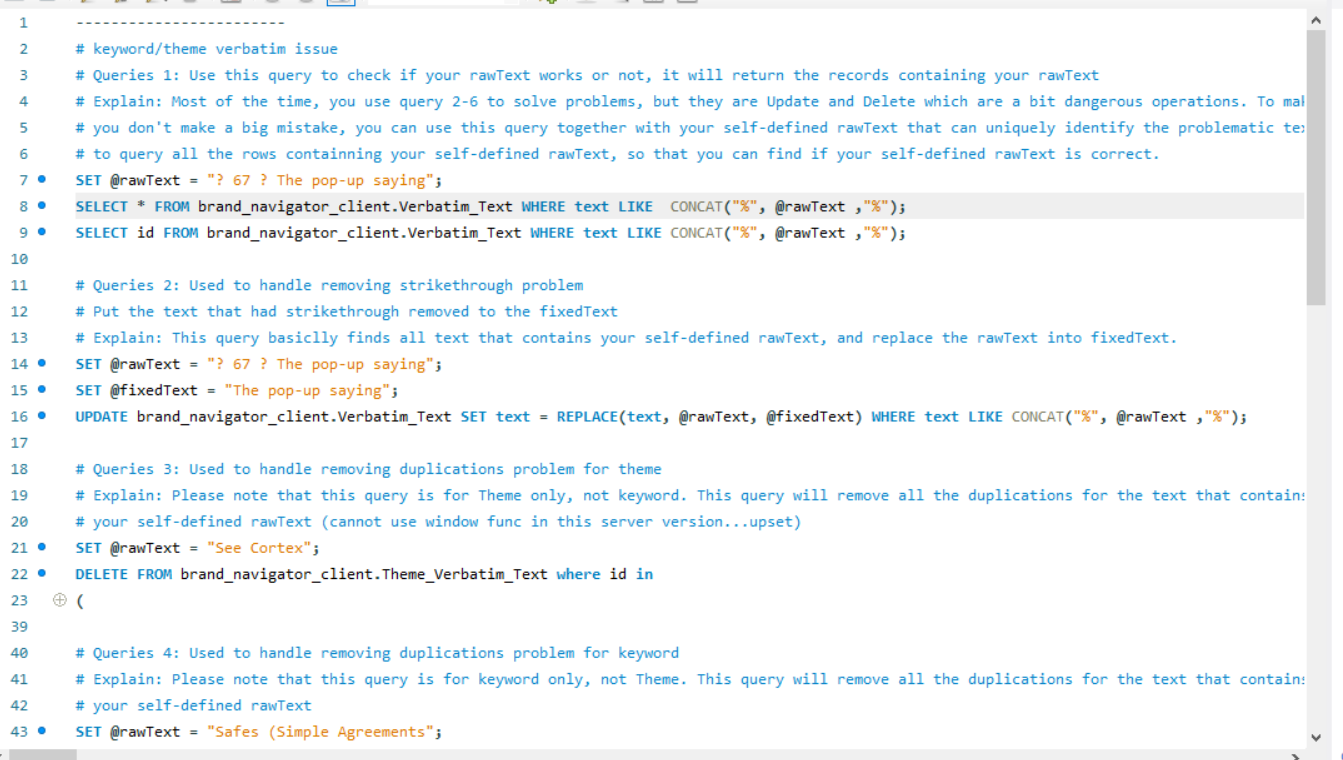
Bring your substring with you and find correct queries for corresponding task you are dealing with. You can see here are different queries for different issues with detailed comments. You should be able to get these queries from Github.
Theme Ticket
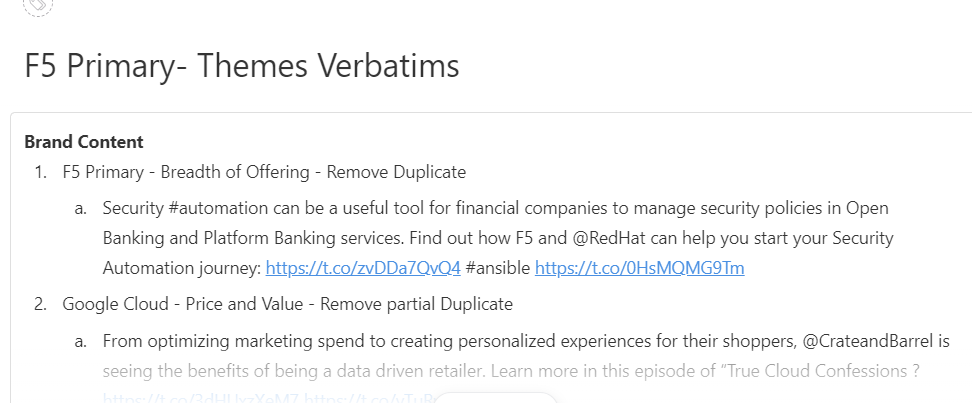
Here is an example of Theme issue, it is pretty much the same to the keyword issue. You should refer to more details in Keyword instruction.
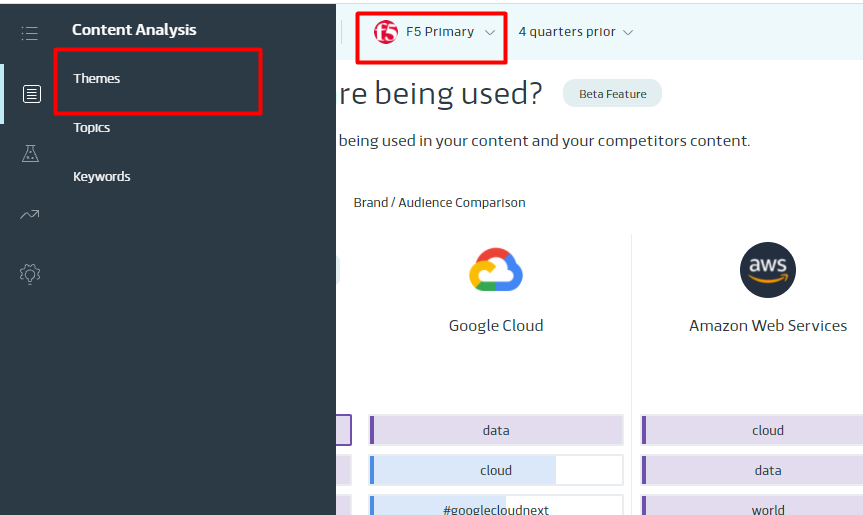
Go to client’s platform, choose correct hero brand and go to Creative–Keywords. The following operations is as same as the keyword, but you need to pick queries wisely, some are for keyword, some for theme and some for both.
Logo Ticket
1. Here is an example of logo ticket. Logo ticket typically asks you to either insert new logo or replace problematic logo. But the operations are pretty much the same. In the given example, the request is to insert a new logo. So, let’s do it now.
Log in the client’s platform, choose correct hero brand and go to Market Index-Scorecard
If you complete the step 2, then you will find a list of screenshots. Here are the logos the client is talking about. Sometimes, they feel like some logos are not good,
so they expect you to change it.
Go the S3 bucket where stores all logo pics.
Go back to the ClickUp and download the logo the client wants you to insert/overwrite(replacement is actually overwriting old logo pic).
6. If the request is replacement, then you try to search the brand in the bucket with brand name, then upload your new logo pic and overwrite previous logo(This may involve renaming object) . If the request is insertion, rename your downloaded logo to the domain of this brand. For example, rename the logo of Google to google.com, if you don’t know the domain of the brand, just google the brand and you will find it on its official website. Next, upload it to the bucket and rename it(If you upload a pic, it will be xxx.com.PNG, you need to remove “.PNG”).
Digital Ad Ticket
An example of digital ad ticket, the text in the red rectangles are Hero brand, and the brand the client wants to deal with, respectively.
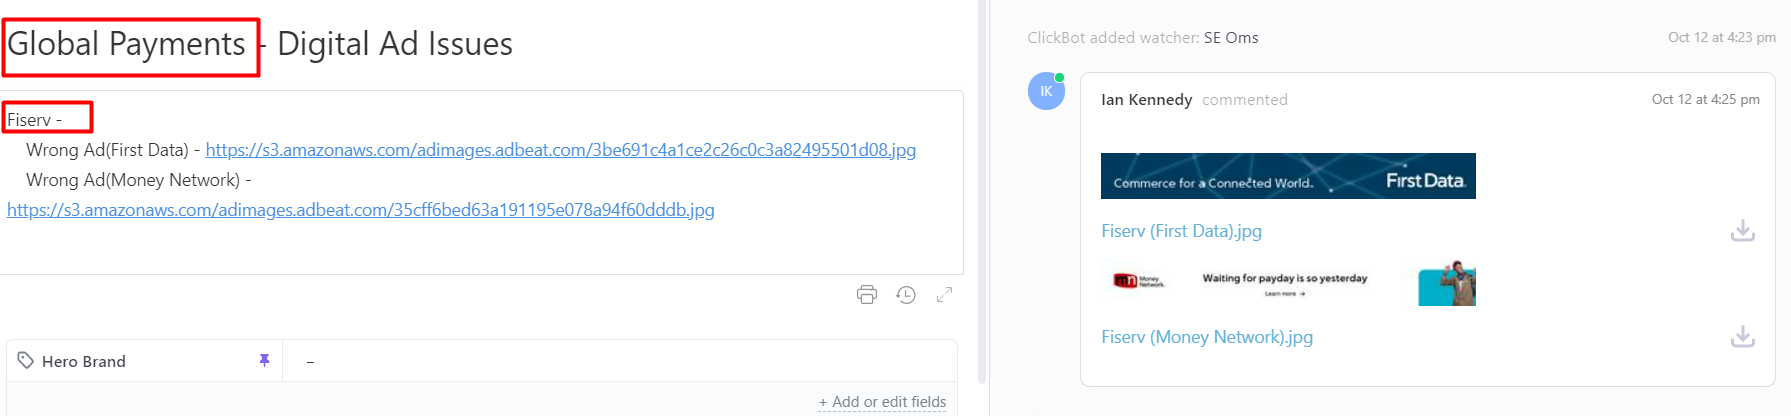
Please note that, the requests of digital ad ticket can be various, the writer only had met the request to ask him to remove problematic ads, but there could be different requests for this ticket. You need to consider to either ask Bret or refer to previous videos.
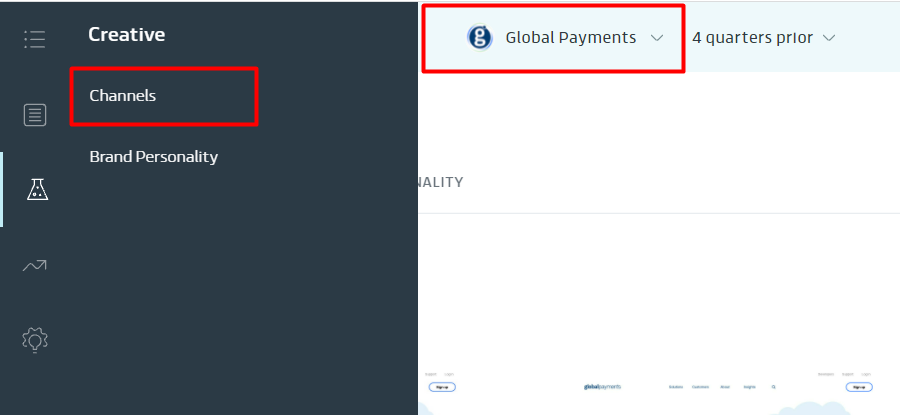
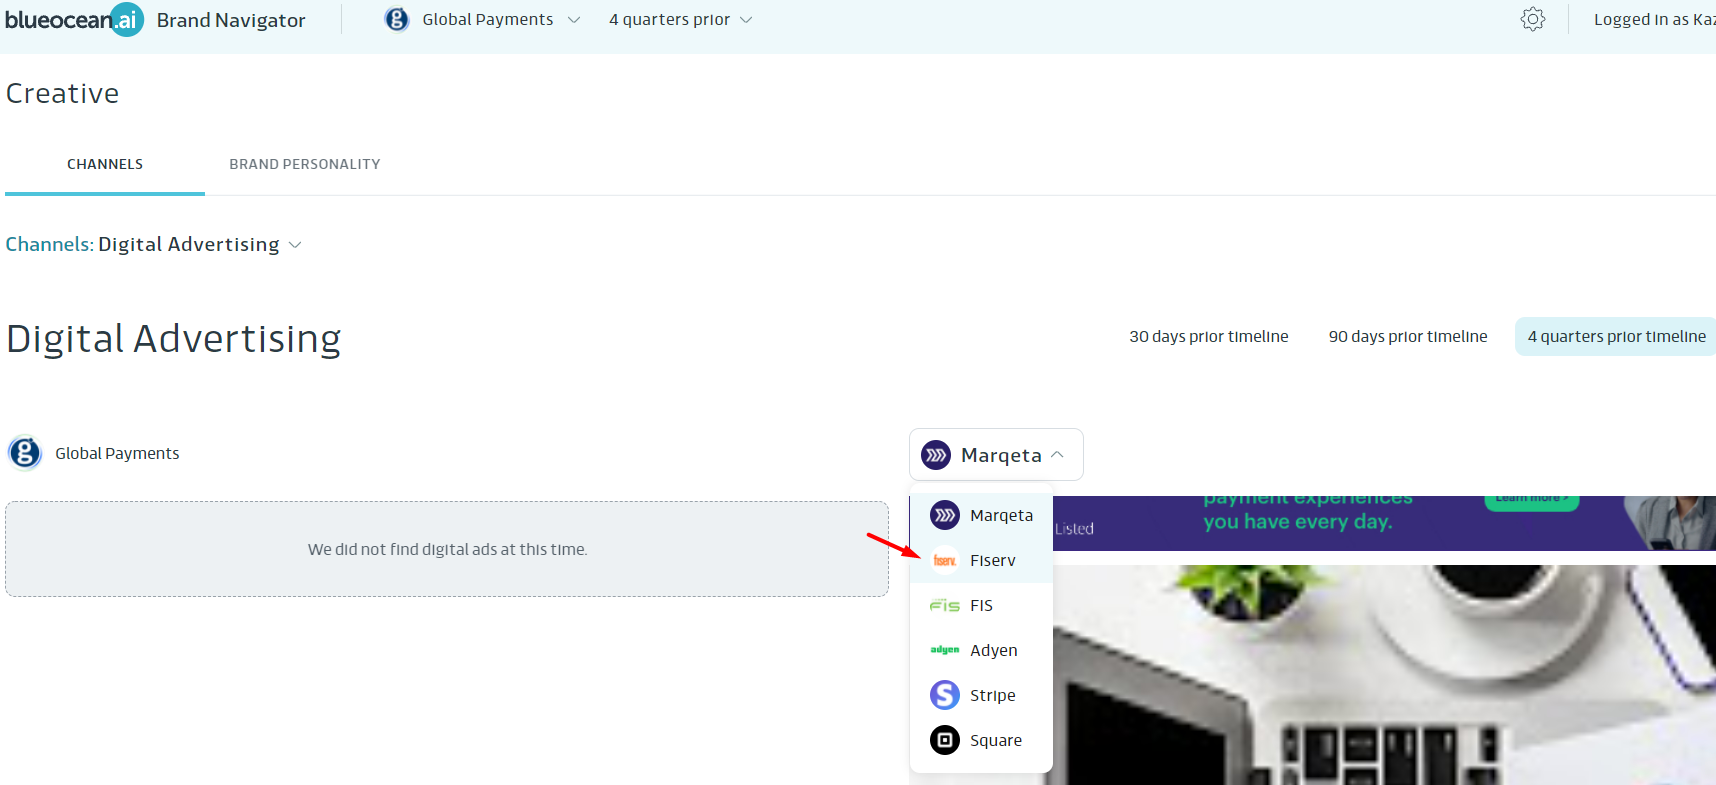
On BlueOcean.AI Platform, choose correct hero brand and go to the Creative – Channels section, and click Digital Advertising button on that page.
After you complete step 2, you will see the page like below. Find the right brand you need to deal with.
4. After you complete step 3, you will see the page like below. You can see there are some problematic ads put under the target brand you need to remove these problematic ads
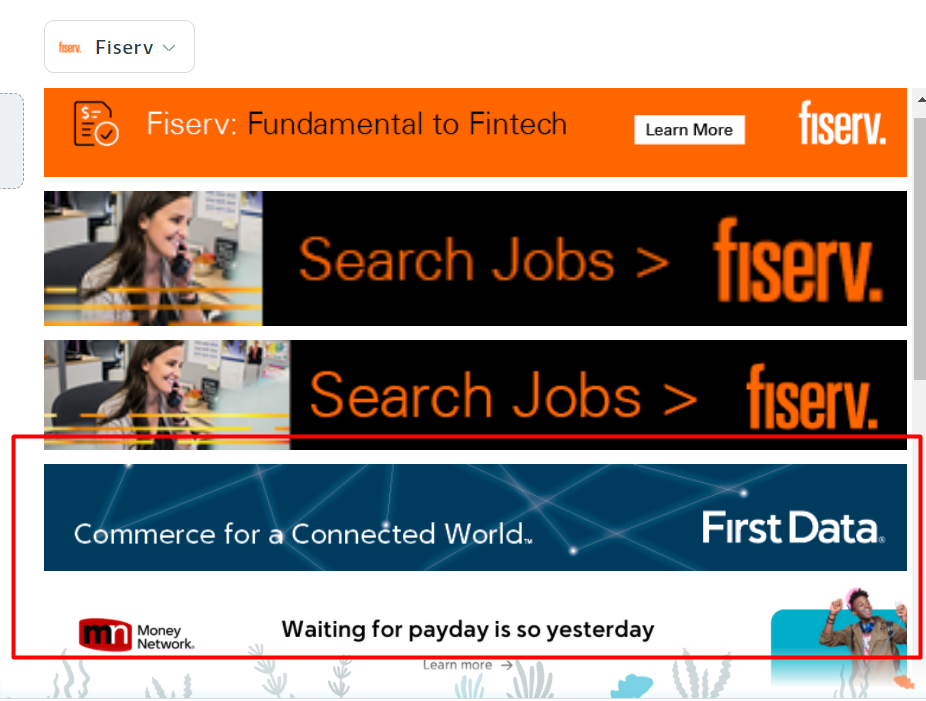
After you complete step 4, you will see the page like below. You can see there are some problematic ads put under the target brand
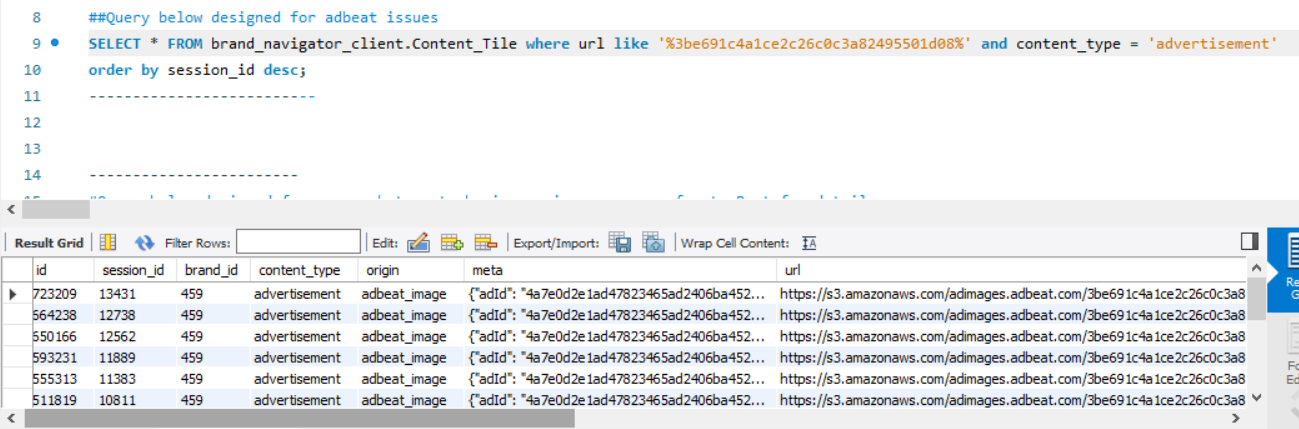
Use the url in the step 5 to implement the query in the database. Find the query below and change the where condition of “url”.

If your query is correct, then you shall get records like the pic below. These records indicate all the mapping based on the given advertisement.
8. However, sometimes, you may see one advertisement can map to different brand(If you didn’t find one-to-many relationships, feel free to delete them all and jump to the step 10). In the example below, you can see this ad maps to both 333 and 459. But you need to make sure you are performing deletion to the correct brand. We will cover that in the step 9.
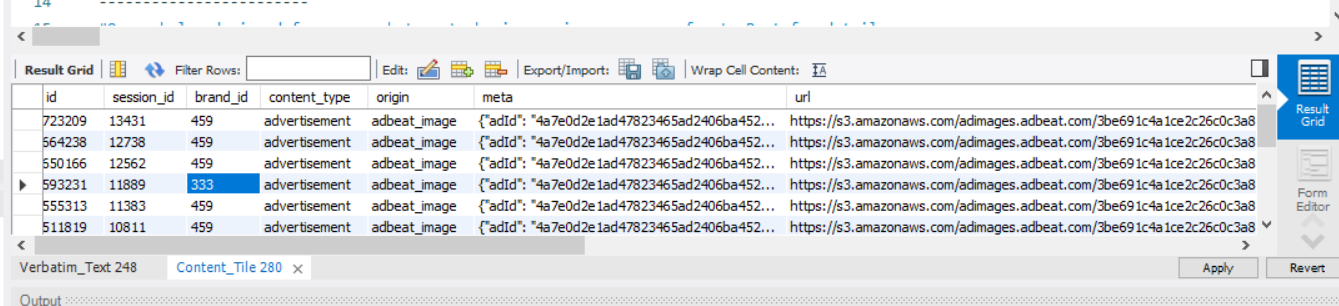
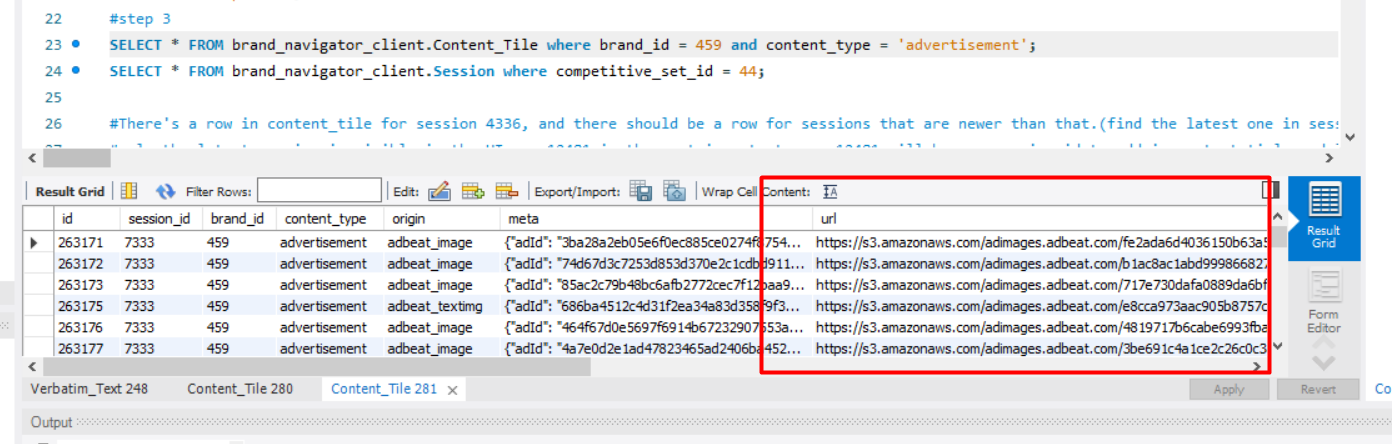
9. If you cannot make sure which brand_id is correct, use the queries below to help you do the verification. For example, you can use the name of brand you are dealing with to query its brand_id. After you can confirm your brand_id, back to the step 8 and delete corresponding records.

If you can confirm your brand_id, delete all records like below and verify your operation on client’s platform.
How to solve different tickets (Client Version)


